11.25.2014

Little Lady Turns Two


There aren't even really words to say it - but, you know.  Words aren't even necessary when it comes to celebrating someone you love.  This one - Little Lady - there's no end to the joy and laughter she brings us as our precious daughter and little sister.  Happy TWO!


11.02.2014

Jacob's Ladder Modern Baby Quilt

It's turning cold - therefore, it is quilt and soup season.

Here's a little baby quilt I was able to put together for some dear friends who are expecting their first in just a few weeks.  Until I get to hug their precious son in person, this little quilt will have to do the trick!

This Jacob's Ladder Modern Baby Quilt measures about 28" x 40".  I pieced small strips on a white background with a faux applique method - no real pattern, just fun piecing!
 It is quilted all over in a meandering free-motion pattern.
 And there - can you see it? - the tiniest of labels!  That's a new addition to my etsy shop!


10.21.2014

Chewy Granola Bars

"Quite Possibly The Best Thing To Come Out Of My Oven, Ever" Chewy Granola Bars
based on a recipe from my friend Valerie

yield: about 3 dozen 1x3" bars

3/4 c. soft butter
1 1/2 c. dark brown sugar
3 Tbsp. maple syrup or honey
1 tsp. vanilla
1 tsp. almond extract
1 egg
1 1/2 c. flour (I used 1 cup of almond flour* and 1/2 c. all-purpose flour)
1 1/2 tsp. cinnamon
3/4 tsp. baking powder
1/2 tsp. salt
1 c. oat flour* (made by pulsing rolled oats in a food processor) + 1 c. rolled oats
2 c. rice krispies
1 c. chopped nuts
1 c. raisins or dried cranberries, or a combination
1/2 c. dried sweetened coconut

Preheat oven to 350 degrees.  Mix together wet ingredients in a small bowl, then add sugar.  Mix together dry ingredients in a large bowl and add in wet ingredients (I did this step in a mixer with a dough hook to save myself the stirring).  Press into a well-greased 9x13" pan.  Bake for 25-35 minutes.  Cool then cut into bars.

Ya'll.

I hit the jackpot with this.  I am definitely not telling you I'm an amazing cook -nope, what I'm saying is that this is an amazing recipe.  And it made a TON!  I cut these into 1"x3" bars because they are really hearty, and it turns out that they are just the right size for stuffing in my mouth when the kids aren't watching.  What's that?  You've never done that?  Oh.  Well, I sneak food all the time because my precious vultures sweethearts love to eat as much as I do.  Don't worry, they're getting them too ... just not every time they happen to walk by the fridge!


So, go.  Make these.  Be a better person than me and share them with those you love.

*If you don't have almond flour, no biggie - just use 1 1/2 c. all purpose flour.  And if you aren't in the mood for pulverizing oats in a food processor, omit the oat flour and throw in an extra cup or so of rolled oats.

10.08.2014

Cookies, and First Things

Best Chocolate Chip Cookies (an updated version of these

3/4 c. coconut oil
3/4 c. brown sugar
1 egg
2 tsp. vanilla extract
2 c. flour
2 tsp. cornstarch
1 tsp. baking soda
1/2 tsp. salt
1 c. bittersweet chocolate chips, or any combination of things to equal 1 cup (dried cranberries, coconut flakes, chopped dates, rolled oats, chocolate/white chocolate/butterscotch/peanut butter chips, etc)

Preheat oven to 350 degrees.
In the bowl of a stand mixer fitted with a paddle attachment, cream together coconut oil and sugar until fluffy and light in color.  Add egg and vanilla and blend in.
Mix in flour, cornstarch, baking soda, and salt.  Stir in chocolate chips/other additions.
Using a cookie scoop or tablespoon, drop dough onto a baking sheet.  Bake for 8-10 minutes, until barely golden brown around the edges (the tops will not brown, but do NOT cook longer than 10 minutes!).
Let cool on the sheet on a wire rack for five minutes.  Remove from baking sheet and let cool completely.  Makes approximately 3 dozen.

Ya'll.  This girl started preschool!  I may or may not have used these cookies as an incentive to let me get some first-day-of-school pictures.


She loves it!


Prepare yourself for a bit more preciousness.  She finally fits in these teensy Chacos that have been in the "to-grow-into" box for two years.


Also, we just completed our first sewing project together: a ruler holder.  Maybe you didn't know that rulers needed cases, but they do.  Let us know if you need one for a measuring device you possess.  She's really good at these.


So many first things!  Good thing there are plenty of cookies for mommy ...

9.29.2014

Roasted Tomato Sauce


If I could have only one thing from a garden, it would be tomatoes.  Millions of them.  OK, maybe more like hundreds, or even just dozens ... but, tomatoes.  They are the reason I garden.


About a week ago, I found myself in possession of almost 30 pounds of tomatoes, all at once, all ripe.  I immediately wanted to eat every single one figure out a way to preserve one of my favorite things about summer because - I'll have to face it soon enough - winter is coming, and I'm going to need encouraging.  My friend Erin had told me that she had roasted some tomatoes and made a sauce, so I decided to try it myself.  Typical sauce-making methods call for lots more steps and time than I was willing to do - like, pureeing the solids FIRST and then boiling it for a few hours to cook off the liquids.  No, thanks.

You can make this with ANY amount of tomatoes you have - don't think that because you aren't starting with sinkfuls of tomatoes you can't do it. Also, you can adjust the other veggies you add in there - I did a batch with sweet potatoes and zucchini instead of carrots; I also think that adding more onions or garlic would make a really fantastic sauce. 

Roasted Tomato Sauce

10 lb. tomatoes
2 lb. carrots
2 sweet peppers
1 onion
2-3 cloves garlic
2-4 Tbsp. olive oil
1 Tbsp. salt
1 tsp. pepper

Wash and place in a roasting pan: tomatoes with stem core removed, carrots and peppers, quartered onions, and peeled garlic cloves.


Drizzle olive oil over the vegetables, and sprinkle liberally with salt and pepper.  Stir to coat everything.

Roast at 400 degrees for 30-45 minutes or until the tomatoes have split and released their juices, and some of the other vegetables are golden brown.


Place a large colander over a large bowl; scoop out the roasted vegetables into the colander.  Let it sit and drain for 10-15 minutes.  You can gently press on the solids a bit if you need to to let the extra liquid drain out.  I highly suggest saving the liquids to use for cooking rice, braising meat, or as a soup base (I did all three).  If you're not sure what to use it in, consider substituting it whenever a recipe calls for some kind of broth.


Now, puree the solids in a blender or food processor, or with a stick blender. 


Freeze or can the sauce, according to your preference. 

Word to the wise: consider freezing it in the amount that you think you'd use at a time instead of in one giant ziploc bag.  Since we eat a lot of pizza (this kind or this kind or this kind), I freeze it in little 1/2 cup amounts - just enough for pizza sauce for two pizzas - so that I can thaw out what I'm actually going to use.  I also prefer to can tomato sauce in smaller jars for the exact same reason.  Also, it lasts longer that way. 

If we eat pizza once a week, I think I'll have enough sauce to last until March.  Summer will carry me through winter.  Encouraging, indeed.

9.12.2014

Quick Pizza Dough from Scratch (or, Zero to Pizza in an Hour)

Yield: 2 10-inch pizza crusts

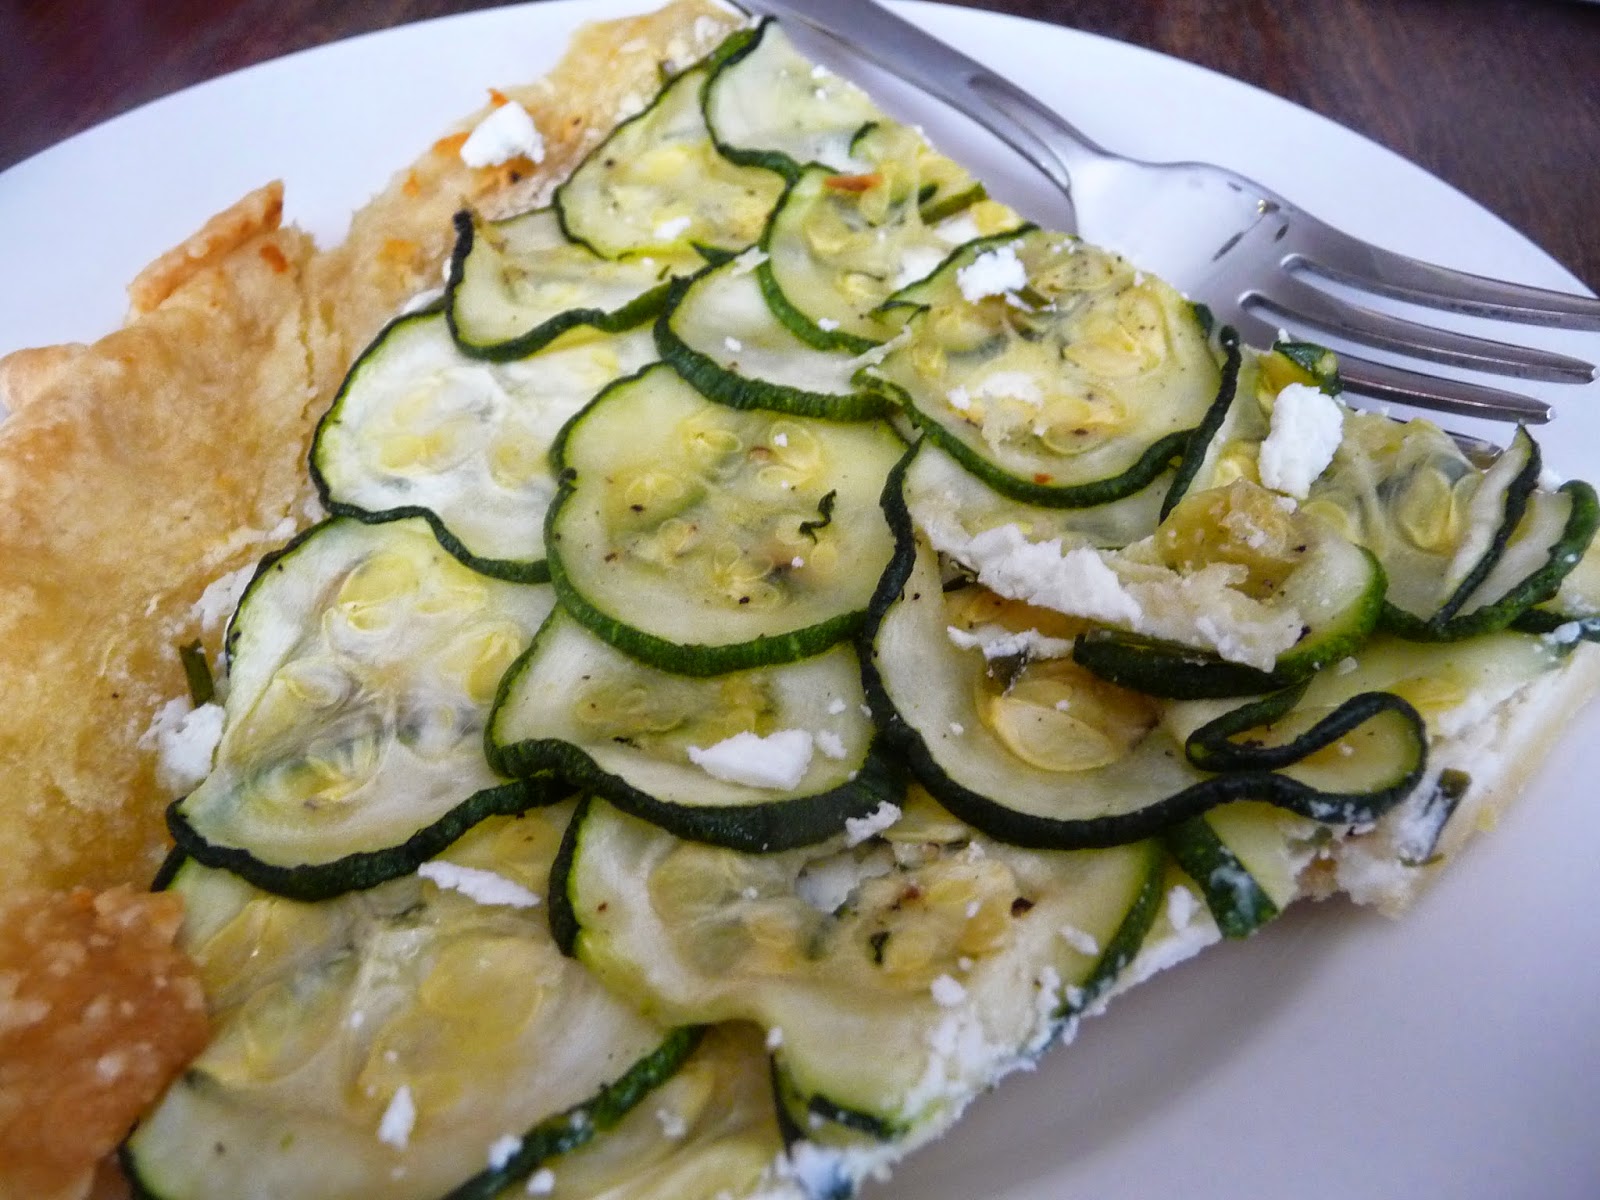
Make pizza from scratch!
2 3/4 to 3 1/4 c. all purpose flour
2 1/2 tsp. active dry yeast (one package)
1/2 tsp. salt
1 c. warm water (120-130 degrees)
2 Tbsp. cooking oil

In a mixing bowl combine 1 1/4 c. flour, yeast, and salt; add warm water and oil.  Beat on low speed for 30 seconds, scraping bowl constantly.  Beat on high speed for an additional 3 minutes.

Using a wooden spoon, stir in as much remaining flour as needed.  On a lightly-floured surface, knead in enough flour to make a moderatly stiff dough, about 5 minutes.  (I do this step in my stand mixer - I attach the dough hook and add the remaining flour about 1/2 cup at a time until it's well incorporated.  Once I've gotten a stiff, not too sticky dough, I let the mixer do the kneading.  If it's too dry and flaky (like, maybe I accidentally added too much flour there at the end), I add some warm water one teaspoon at a time.)

Divide into two pieces; cover and let rest for 10 minutes.

Shape each piece into a 10-inch pizza crust; add sauce and toppings/cheese of choice.  Bake at 425 for 14-18 minutes, or until crust is brown and cheese is bubbly.

I've been absent for a month and a half ... and I return with pizza.  I bet you thought that I was working on some really amazing culinary creation, which would explain my lack of posts.  But, no.  Pizza.  Delicious, easy, homemade pizza.


What's that?  Wondering what I've been doing?  Well, I'm so glad you asked.  See, I have these two kids I get to hang out with, who are really awesome and precious and energetic and talkative.  That's what I've been up to, instead of cooking and blogging.


We have been filling our summer days with so many wonderful things that DON'T involve hot kitchens.  Let me just be real: we have eaten a ridiculous amount of hummus and cheese sandwiches.  I couldn't bring myself to blog a sandwich recipe, but I'm pretty sure that 5 out of 7 days a week involved hummus and cheese on a tortilla or bread (or crackers if I really wanted to be zippy).

We've been eating a lot of picnic dinners at the playground that's right next door to our community garden plot.  Enter sandwiches again (and how could I keep sharing sandwich recipes?  Really.  No one wants those.)

We were out of hummus (oh no!) but still needed a picnic dinner, so in came the pizza.  I didn't have the forethought to make my go-to pizza crust in the bread machine, but I remembered a recipe my friend Cindi shared in a group cookbook we did back in 2010.  The pizza came together - from thought to hot-out-of-the-oven - in less than an hour.  Not bad!

So, that's why there's pizza.  Because it was quick, and portable, and delicious, and easy for the kiddos to grab between sliding and swinging at the playground.

A few other things from the summer:

All of a sudden, Little Sister decides she'll master climbing up into her booster chair.  Like, she wasn't doing it, and then she was.  These kids.  Stop the crazy changing already!

Tomatoes!  And baskets.  Both endeavors are keeping me so happily busy.

And just a few more: special time with some really, really special people ...


7.24.2014

The Annual Zucchini Roundup

I'm sitting here in my new house, on my new street, in my new neighborhood, in a new city.  Granted, it's just two miles from the other one, but still.  It's new to us.  We are unpacked and making our daily living space work for us.  I am not sure I thought I could be more content with less space than I'm used to, but geez - I'm happy with this space.  It took me a whopping 8.5 minutes yesterday to clean all the rooms but one.  That deserves a "woohoo" if anything does.

Oh, and look at these sweeties: my little kitchen helpers.  Goodness, do they make me melt.  Big Sister just keeps me at the edge of my seat, waiting for the next awesome thing she's going to say (like yesterday: "Hey, Mommy, you're the best mommy in the world.  I like being with you.  Now will you please go out of my room?").  And Little Girl is pure spunk: keeping up with the big kids, and running to give kisses and hugs like there's no tomorrow.  She likes to shush her baby dolls, ask for things by name (I finally figured out "nee-nets" means Kleenex), and generally do everything by herself.  


Oh, the zucchini, you say?  I almost forgot that this is a post about zucchini.


Here: friends from church gave us some.  The picture doesn't do it justice, but look at the one at the back, and then realize that it's as wide as the cart it's sitting on ... which is 18".  Yes, a massive zucchini.  I promised these friends that I'd repay the kindness with a little rundown of what I was doing with the zucchini (as well as a little treat, but shhh, don't tell!).

Here's what we've done so far:

Chocolate Zucchini Bread, with chocolate chips of course.  I actually reduced the sugar by half and upped the amount of shredded zucchini in there.  According to custom, one must refer to this as "vegetable bread" and must eat some whenever one's body needs some vegetables.

Goat Cheese-Zucchini Tart: using this recipe from Fine Cooking as a springboard, I used up about 4 oz. of goat cheese mixed with some local herbs (ehem - from my back herb garden!), spread on a pastry crust.  I did make my own crust, but I think a storebought dough would work beautifully as well.  It's a pretty simple recipe, and the flavors really mix so nicely!


Zucchini tacos: OK, no recipe here.  But I chopped up some zucchini into 1/4" cubes and sauteed them in oil for a bit - so they'd get soft but not mushy - then added a tablespoon or so of fajita seasoning.  Then we just layered them in tortillas with the works before gobbling them up in about 42 seconds.

There's still half a zucchini left: that's going on tonight's pizza along with some eggplant, tomatoes, pesto, and parmesan cheese.

(and yes, it will be followed by vegetable bread.)

6.24.2014

Stovetop Granola (and normal eating during transitions)

Recipe from NOLS Cookery, 6th Edition.

Makes 6 cups, serves 4

5 Tbsp. butter
3 cups uncooked oatmeal flakes (I used old-fashioned rolled oats, but not the instant kind)
1/3 to 1/2 c. brown sugar or honey (depending on sweetness of fruit)
1/2 tsp. salt (if nuts used are unsalted
1 c. dried fruit
1 c. nuts and seeds

Chop fruit and put into a bowl, add water to cover.  Melt butter in a frying pan.  Add uncooked oatmeal and salt, stirring to coat with butter.  Sprinkle brown sugar over the top; add drained fruit and nuts.  Keep stirring until oatmeal is fried to a golden brown.  Can be served hot as is or with milk, or cold.


Friends, we are moving across town!  And we are so excited.  But it is hard work to move.  It's also hard to think about maintaining our food routines while we're in transition - which I'm realizing is important when there are young kids involved in a move.  One or two things out of whack is enough.  No need to throw in crazy digestion.

SO ... I usually make my favorite granola in big batches and keep it in the pantry ... but, I packed up most of my bowls and pans a while ago.  What I DO have available is a cast iron skillet.  I came across this recipe in a NOLS cookbook the Mister gave me for Christmas (intended for our family camping adventures, but suitable in this instance too!).  I've made it a few times in the last week - one batch is perfect for a breakfast (and gives me a bit of leftovers to snack on later).  I LOVE that we get to eat homemade granola without waiting for the baking and cooling processes.  Within 10 minutes of thinking, "This would be a great morning for granola!", it's on the table.  Seriously.

Some of the other breakfasts we've got on our minds during the move: 
-scrambled eggs with cheese and salsa verde on toast (remember, I kept out the skillet)
-smoothies (I have a handheld immersion blender that's about as valuable to me as the aforementioned pan) 
-these whole wheat oatmeal muffins (I made a double batch and stashed them in the freezer, but they're easy to whip up in just one bowl, and could be made into a "coffee cake" and baked in a cast iron pan if muffin tins are already in boxes).

Whether or not your summer plans involve a change of address, I'd encourage you to try out this recipe!  Hope you love it like we do.

6.19.2014

Before and After: Thrifty Lamp Re-do

You probably remember how much I love finding things for free, especially finding them on the side of the road for free - something about that just feels so awesome.  I'm pretty sure it was last summer that I picked up this lamp from a heap of stuff in my neighborhood: functional lamp, but definitely not my style.  Talk about unfortunate.
Lamp re-do: BEFORE
Fast-forward many, many months.  We decided to move out of our current house into another house across town, and I told myself I wouldn't take any half-finished projects with me.  It was either toss this into my own roadside pile for the next lucky scavenger, or get cracking.  As you might guess, I decided to just jump right in.  So glad I did!

I'm squeaking this baby in just under the wire!  11 days until our move, and now, the lamp is finished!
Lamp re-do: AFTER
I hot glued sisal rope around the lamp base, coiling it around and around.  It's a little shaggy looking, and very rustic - much better than a yellow porcelain dandelion.  And here's my little "untutorial" on how to do a lampshade: check out this post by Young House Love.  All you need is a lonely and/or desperate looking lampshade, some hot glue, and some fabric.  And ... go!

Total project cost: less than $10!  It did take a lot of hot glue, but this was a seriously thrifty project!

The move, the push to finish projects, and general summerness is accounting for my lack of frequent posts these days.  I'll try to squeeze in a few more project finishes if I can, and at least another recipe or two during our transition!

6.12.2014

Improv Modern Baby Quilt (a quilt for Nibbler)

We've enjoyed lots of special visits with dear family and friends recently - a precious wedding, celebrating a new house, a potluck reunion on a lawn with old friends, walks and playdates and water adventures and more - all kicking our summer off to a most lovely start.

There's another big family event coming soon - "Nibbler," my little neice or nephew, is due in July - and we are all beside ourselves with excitement.  I knew I wanted to make a special little quilt for the newest family member, and dreamed up this idea while I was teaching an improv class earlier this spring.  

I went with a giant stitch-and-flip project, with each white block measuring 9 inches. The final quilt measures about 33" square.  


I love that it looks like just one quilt square!  I've seen a few other quilts that have taken traditional patterns and enlarged them, but this is my first time trying.  It won't be my last.  I am thrilled with how it turned out!

The back is a VERY light green-polka-dot-on-white (that barely shows up unless you're looking for it).


And the quilting - well, I tried something new.  It certainly came together quickly - just up and down loops across each block, with the opposite direction in each colored triangle.  This was a fun one!


Alright, Nibbler - we can't wait to meet you!

5.15.2014

What To Do With Too-Small Onesies

I've been in a massive cleaning and purging mode over the last few weeks, which has felt AWESOME.  One thing I've run into though is too much of one thing (baby onesies that don't fit a growing-taller baby, for example) and not enough of another thing (t-shirts that don't swallow said baby whole).

So I had the idea - why not just upcycle onesies into toddler t-shirts?

No sewing required.

Just snip straight across the bottom of onesie ... aaaaaaand, you're done.  Because onesies are made of knit fabric, they don't fray.  They'll roll up a bit with wash and wear, but won't come unraveled.  


You know I hate throwing anything possibly useful away.  So, thanks to an idea from my neighbor, the leftover bottom parts of the onesies are now going to be fine motor skill training experiences.  I trimmed off the excess fabric and left just the thick trim with the snaps.  Big Sister will LOVE this on our next car ride, I just know it.  Snap, unsnap, snap, unsnap, snap, unsnap.  I bet it will keep her occupied for at least 3 1/2 minutes.


5.13.2014

Our CSA (Alternative)

I love the idea of a CSA ("Community Supported Agriculture") box - a farm subscription for a season that provides us with fresh and local produce while at the same time gives a farm a reliable source of income.  Seriously - I love it.

Kale buds: yummy on salads.  Also, very random.
But we've never done a CSA before.  Instead, we came up with an idea last summer that works for us.  I like to think of it as my CSAlternative.  A bonus is that we have a little more autonomy over what we get each week, and we don't have to shell out hundreds of dollars up front for things we may or may not really want.

We take $20 per week out of our grocery budget and put it in a farmer's market budget.  (I literally do this with cash ... I find that I like the more tangible presence or absence of cash when it comes to budgeting).  Every weekend, we go to our little market and make ourselves spend our money.  To be quite honest, it was a little tough at first ... $4 for a head of lettuce made me want to shriek in agony.  But we made ourselves get on board with spending our cash - because, after all, it is farmer's market money ... just a few dollars here and there throughout the market, until we were out of money and had a few new things to try.

It definitely doesn't get us through the whole week, or let us try everything we might see.  But it does make it possible for us to be consistent at a farmer's market on a pretty tight food budget.  And $20 is pretty do-able, right?

It's worked out nicely that if we travel, we can just try a different farmer's market.  In the winter, we spent our market cash on other local goodies (or hot chocolate from the cafe near the market).

It's just a little thing, but it's worked for us.  Maybe one day we'll venture into joining a real CSA, but for now we're satisfied with our alternative.

5.01.2014

The Story Behind Unconvenience

This business of going all "Unconvenienced" started with a coffee pot.

Or, more precisely, without a coffee pot.  Once upon a time, our nice high-end wedding present of a coffee maker got a short in it and went on the fritz (i.e., it started melting from the inside of the display and caught ever so slightly on fire before we unplugged it).  At the time, the Mister was in graduate school, I had quit working to stay home with our kiddo, and we didn't have the space in our budget to replace said coffee maker.  So like any resourceful outdoor enthusiasts would do, we raided our bin of camping gear and resurfaced with a sturdy french press.

Sure, making coffee with a french press required more time and energy than we had spent on coffee prep before.  But the coffee was SO good (noticeably, outrageously delicious) that we decided we didn't mind the extra steps it took.  There was something we actually enjoyed about taking some steps "backwards" - that is, away from the nice convenience of a coffee pot with a timer and brew strength button - that made it feel like more of an accomplishment and less of a hassle.

That was the start of the Unconvenient for us.

We hear that it's good to "unwind" after a stressful time, that occasionally "unplugging" from technology is helpful ... so, reaching for the "Unconvenient" isn't really that much of a stretch.  Unconvenient - not inconvenient, but Unconvenient.  Backing away from Convenient.


There are so many things that I assume have to be a certain way - how I buy my groceries and prepare food, for example - that Unconveniencing myself requires something to jolt me out of my routine (like a coffee pot catching slightly on fire) and finding other - possibly slower or harder - alternatives.

Don't read into this too much to think that I believe Convenience is bad.  I LOVE my washing machine, a grocery store where I can buy produce and packaging tape at the same time, and a car to get around in.  But my two little words for this year - "intentional" and "simple" - have got me thinking that quicker is not always simpler, and more often than not convenience is the enemy of my intentionality.

Oddly enough, I think some of the Unconveniences in my life that make me slow down or spend more time on things are really, really great ... because they make me slow down and spend more time on things.  

So, there you have it: the Unconvenient Truth.

PS.  Also, this is not a rage against coffee makers.  I love coffee from any source.  And I would love to have a cup with you sometime, friend.

4.25.2014

Pasta Aglio e Olio (Pasta with Garlic and Olive Oil)

from The Top One Hundred Pasta Sauces by Diane Seed

1 lb. spaghetti (or other pasta - as you can see, I used egg noodles here)
salt
6 Tbsp. olive oil
5 cloves garlic
1 small chili pepper
parsley, optional


Cook the pasta in boiling salted water, following the directions on the packet to avoid overcooking.

Meanwhile, heat the olive oil and add the garlic (I have found that a lower temperature is better - I'd say go for medium-low heat).  This is either left whole and removed before serving or it is finely chopped and not removed (I take the second approach).  Add the chili pepper which has been cut into 3 or 4 pieces, cook until the garlic is golden brown.

The moment the pasta is ready, drain it and put into a large serving bowl.  Remove the chili and garlic (if left whole) from the oil and pour the sizzling oil over the pasta, stirring well.  There must be sufficient oil to coat every strand of pasta and make it slippery and shiny.  Add chopped parsley if desired and serve immediately.

Confession: I thought that I had posted this months ago, and then I went looking for it and realized I had been depriving you!  I am so sorry.  I'm trying to make amends though.

This is a quick and relatively easy meal that I literally threw together the other night in about 20 minutes.  The most challenging part (for me) is finely chopping garlic, but that's it!  Oh, the other part is explaining to people you might see after you eat a bowl full of this why you smell so garlicky delicious.

If you happen to have extras around - say, some grape tomatoes, chopped/cooked chicken, or olives - this sauce is very accomodating.  Of course, some would say it's not "aglio e olio" anymore when you add that, but I'll let you call it what you want.  It's that simple, though - heat garlic in oil, pour it on pasta, and stir it up.  Now you see why I needed to share this, right?

4.21.2014

Handwritten Recipes: Aunt Viola's Heirloom Banana Bread

In case you're wondering, the 'i' in 'Viola' is a long vowel sound - not like the instrument.  Say it with me: "Vie-OH-lah."  Yes, that's it.  Aunt Viola was my great great aunt, my great-grandmother's sister.  This recipe has made its way to my hands via my most excellent cousin Becky.  She knows me well (for proof, look closely at what's in parenthesis beside the chocolate chips in the ingredient list).  Cousin Becky, you're a winner.  


Aunt Viola's Heirloom Banana Bread

1 c. sugar
1/4 tsp. salt
1 stick butter
1 tsp. baking soda
2 eggs
4 mashed bananas, frozen then thawed (this is extremely important.  Don't you dare use fresh bananas)
1 1/2 c. flour
1/4 c. nuts (optional)
1/2 c. chocolate chips (not optional)

Mix until well blended.  Stir in chocolate chips and nuts.  Pour in greased loaf pan.  Bake at 350 about 1 hour or until cooked through.


What's been keeping us busy, you ask?  Besides, of course, making and eating banana bread, naturally. 


Well, things like this: a 17-month old who's chatty and likes to pull books off of shelves (and then smiles a melting smile and flashes those blue eyes) - and preparing for my first ever CRAFT FAIR on Saturday 4/26 - and getting a community garden plot (20'x20' of local investment!) - and trying to firm up some farmer's market plans.  Oh, and neighbors and friends and visitors from out of town and local restaurants and spring time and surprise snows and kids.

Just a few little things.  But there's always time for family, and Aunt Viola's banana bread.  Naturally.