3.26.2014

Baby Quilt for Baby B

Attempted partial group shot!
In mid-January, I got to go to Virginia for a reunion with a bunch of friends.  This was no ordinary reunion - for one, it was freezing cold.  Also, none of our husbands were able to come with us, so we were a bunch of ladies with crazy kids in a giant house on an awesome farm.  It was phenomenal!

I have lost track of how many adults and kids there were.  I think it was something like 10 or 11 (moms) and 15 (kids), plus three yet-to-be-born little ones.  Oh, did I mention that the oldest child had just turned four?  The oldest child had just turned four.  My E was the second oldest at barely 3.  


We got to throw a baby shower for our sweet friend V, who was expecting her first just a few weeks after the reunion.  Besides a delicious meal catered by our local friends and a special time to giggle and cry together, we worked on a group quilt for V's little girl.  Each of us brought a fabric from home to contribute.

Given our time frame and limited access to sewing supplies, though, we were just able to cut the quilt out and lay it out before we left.  We left it in the capable hands of a local friend who's shared some photos of the finished product!  I am SO excited with how it turned out.

Front:

Back:

With a baby!  A real, live, sweet little baby girl!
In the nursery:


Let's see if I can remember some of the details of this one.  This is going to be the world's worst tutorial on making a windowpane baby quilt, but here goes:

30 3.5x3.5" blocks
7 3.5x7.5" blocks
5 7.5x7.5" blocks
1.5" strips of white to go between the blocks
dark and light strips for borders

Windowpane Baby Quilt
It was meaningful for me to be part of such a special group project with women I've shared so much with.  Hopefully it's keeping little B warm and snuggly until I can get my hands on her in person!

3.24.2014

Thrift Store Find

You all know how much I love free stuff, cheap stuff, thrifted stuff, old stuff, recycled stuff, upcycled stuff ... you get the picture.

I found this beauty at a thrift store this week, and just can't wait to do a million things with my little metal tackle box.  I can't decide if I want it to hold art supplies for the kiddos, jewelry on my dresser, or sewing notions.

Or, it might be my on-the-go emergency kit to keep in my car this summer - just the right place for granola bars and sunscreen.  Oh the possibilities!

3.22.2014

Craft Fairs and Farmer's Markets

Howdy friends, just wanted to pop in with some pictures to let you know I'm stocking up on a lot of baskets in anticipation of some craft fairs and (hopefully) farmer's markets.  It's been great fun experimenting with rope and thread.  My newest favorite: Mega Basket.
You are looking at 200 continuous feet of rope, and I don't know how many feet of thread (I'd guess somewhere around 600-700).  Mega, indeed!

And here are a few other coiled rope baskets ... variations of ones currently for sale in my Etsy shop!


3.21.2014

Improv Quilting Class #3


Our third week of improvisational quilting is now completed.  As always, I am astounded by the talent and creativity that I get to work with!  I am only "teaching" this class in terms of facilitating.  They don't really need me (but shhh, don't tell them that).

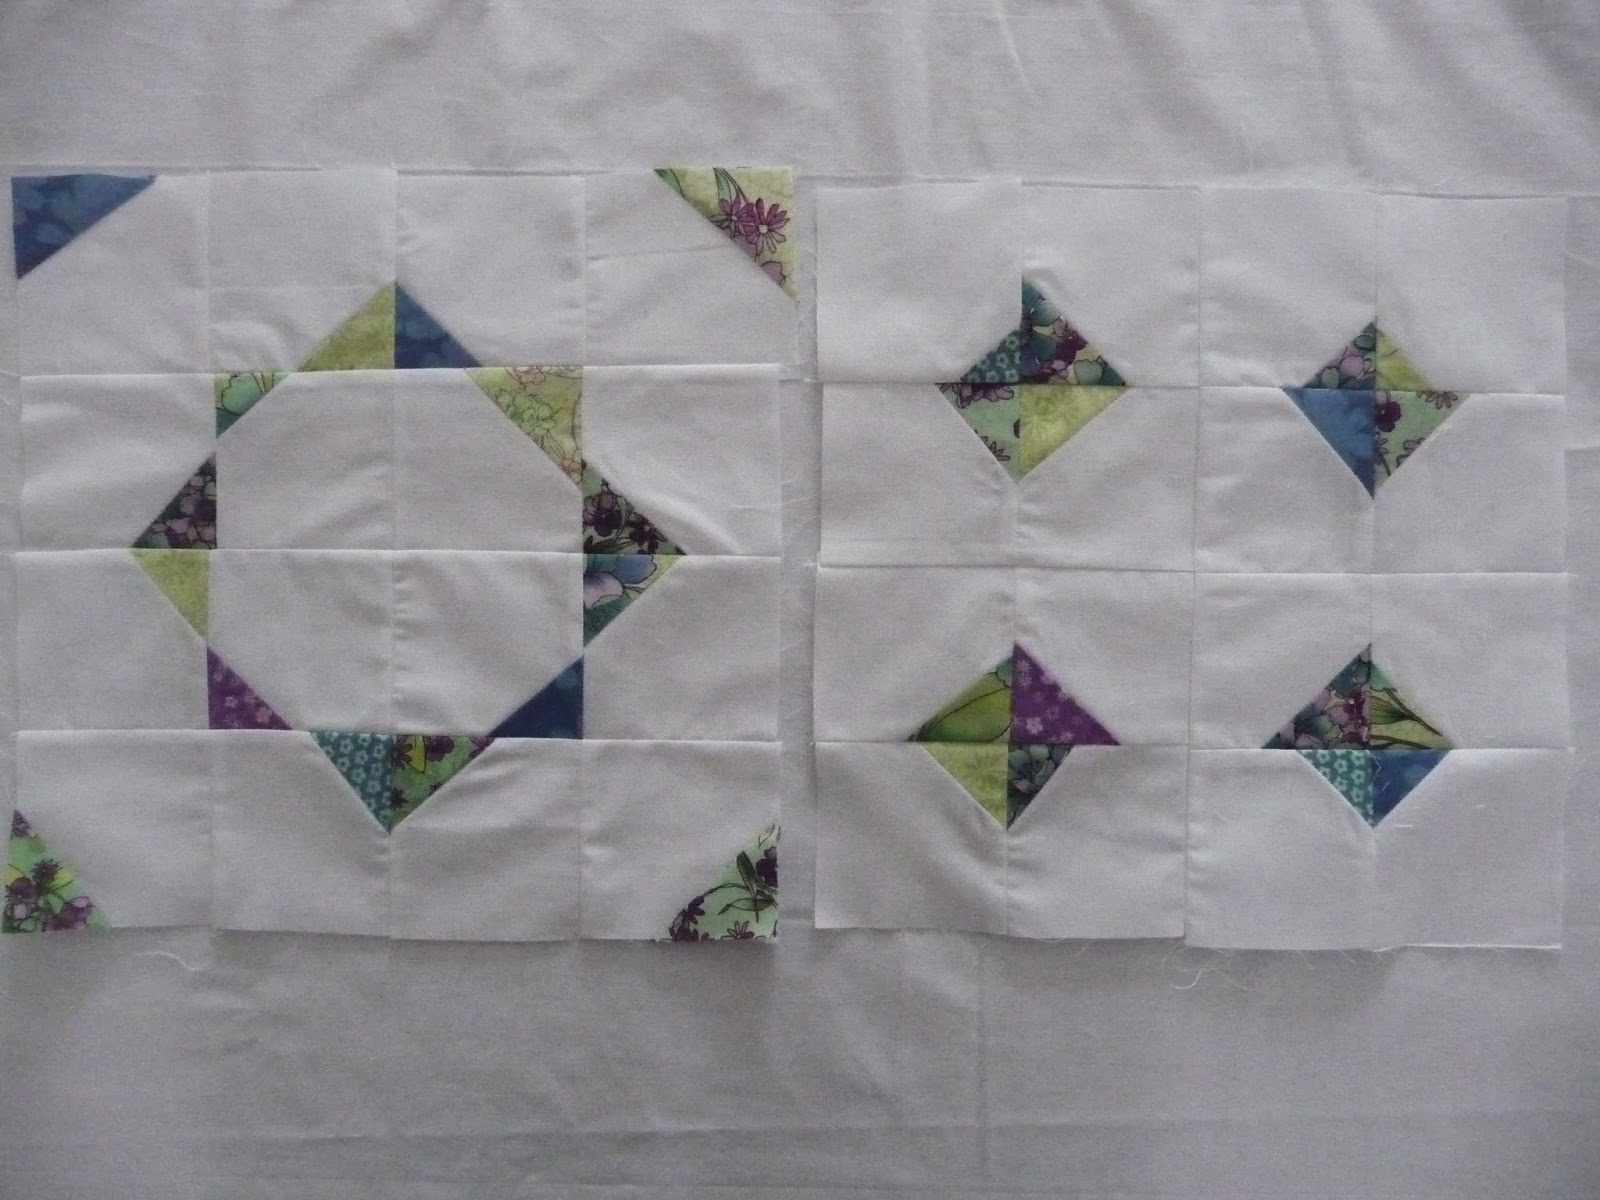
Class #3 was about "stitch and flip" - which may or may not be a real term.  Ha!  I like making things up.  I think it could also be called faux piecing or faux applique (faupplique, if you will).

Start by cutting 16 3.5" x 3.5" white squares.  Take a scrap of fabric of any size (a triangle or rectangle is nice), and with right sides together, sew it to one corner of one of the white squares.  What you want is for the scrap to cover the corner when it's folded over and ironed.  It may take a little bit of eyeballing to get the hang of it (because it feels like you are actually sewing it upside down and backwards).  Repeat with the rest of the squares.

Fold the scraps over to cover the white corner, iron flat, and then trim even with the square.


Arrange 16 squares as desired, sew together, and iron.  Trim block to 12.5"x12.5".


This is how I arranged my two blocks.  You can tell that they are pretty wonky and nothing really matches up - but I'm operating under the philosophy that if nothing matches up, then it looks like it's supposed to be that way!  Don't give away my secrets, please.

I wish I had gotten pictures of everyone's block variations, but I just managed to snap this one.  One of the participants went a step beyond a single stitch-and-flip and went for opposite corners of every square.  Here's what she came up with (I absolutely love it!):


Three more classes to go ... we'll be revisiting the stitch and flip for a second week next time!

3.20.2014

A quilt in the works

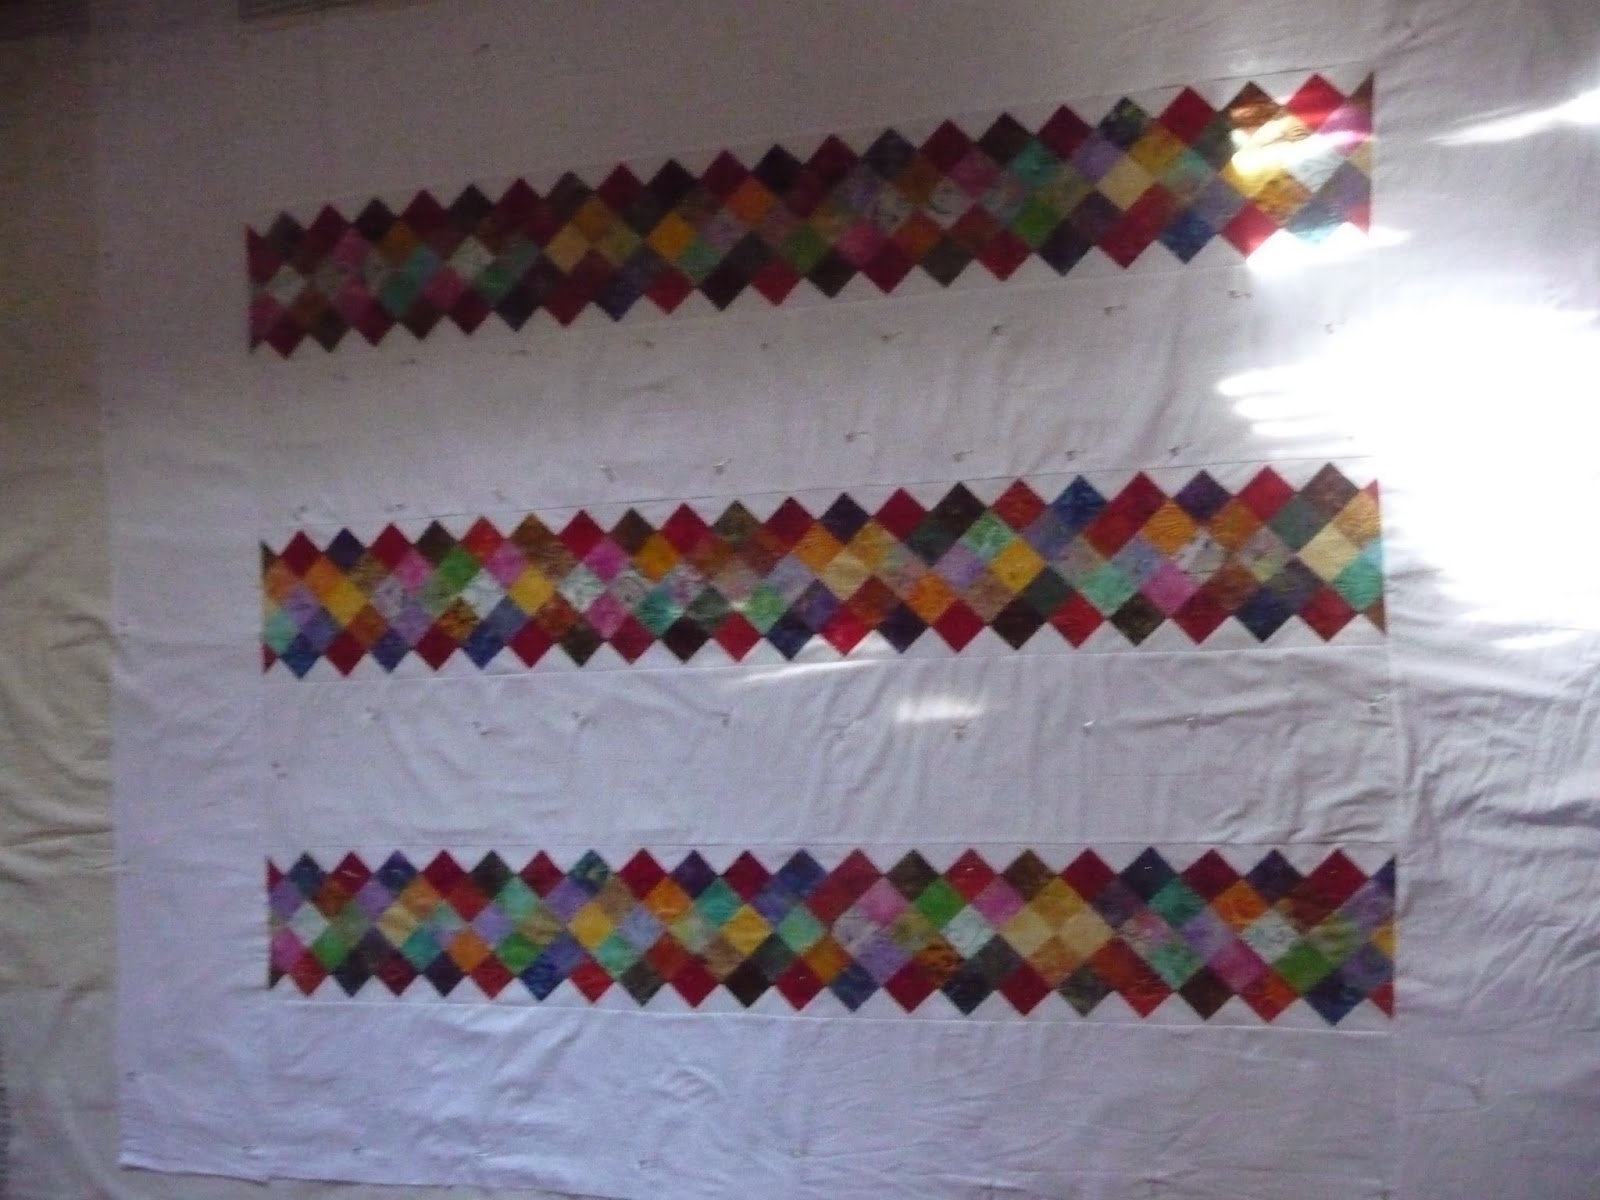
Batik and White North Country Ways quilt
I know it's going to be a big project when it takes every single one of my basting pins to get the quilt ready.  I am excited about this quilt and relieved to see it coming together!  Pardon the weird photo angle ... it was hard to find a place to stand to get a decent picture!

The prints are from a Moda batik jelly roll that I received for my birthday, and the quilt pattern is modified (in size only) from the North Country Ways pattern in Antique to Heirloom Jelly Roll Quilts by Pam and Nicky Lintott.  I finally got the guts slice up the pretty roll of fabrics and get to work!  I'm so glad I did. 

Here's the fun part: I only used half of each strip in the roll, so I'm going to make another quilt with the other half of the strips as a coordinating (but not matchy matchy) quilt.  Once both of them are done, they'll be on Big Sis and Little Sis's beds!  Oh, I am so excited.

3.17.2014

Tips for Long Trips with Young Kids

Hi, friends.

I've taken three separate 10+ hour road trips in the last three months.  These trips were really stellar and a ton of fun.  I would definitely take them again.  But they were also learning experiences, and so I just thought I would share some tips for the crazy parents like me who think it's a good idea to load up some wee ones and hit the road.

First, and most importantly, reconsider.  No, seriously.  Take it from me.  Can you break up the trip at all?  Stay overnight at the halfway point?  Just find a distant cousin on facebook and invite yourself over.  Perhaps if you show up with a nice host gift, they'll forgive you for exploding into their house for a night.


Second, pack snacks.  And I don't just mean throw some pretzels in your car.  I'm talking pretzels, saltines, goldfish crackers, pancakes, raisins, dried apricots, dried prunes, dried bananas, fruit leather, milk, chocolate milk, strawberry milk, juice boxes, grilled cheese sandwiches, ham sandwiches, PB and J sandwiches, nutella sandwiches ... get the picture?  I usually divide up snacks into individual baggies or containers before leaving the house and put everything in one giant bag that I keep within arm's reach (mine, not the kids').  And I don't put a ton in a baggie ... a few pretzels can be enough to distract a cranky three year old for a good 5 minutes, until you can find the gas station or restaurant at the next exit.  Which leads me to my next point ...

Third, try to combine stops.  By this I mean, don't assume that you'll just have a quick go-in-and-potty stop.  Quick things don't happen with young kids.  If you can mentally prepare yourself for doing a lot of things at one stop, you might actually be able to save some time.  For example, if you can get gas, have a bathroom break, walk the dog (who's been stuck in between your screaming kids), and grab a bite to eat all in the same general area, you may actually be able to do all of those things more efficiently than if you tried to do each of them individually.

Fourth, prepare yourself for realityI probably should insert a "haha!" here, but I can't.  Kids will throw up.  Babies will cry.  Traffic will stop.  Gas lights will come on.  Weather will happen.  A 6 hour drive will be 9 hours with kids (or a 9 hour drive will be 15).  Whatever it is, just try to think through the worst case scenario (stuck on the interstate for hours?) and plan accordingly (bring a thermos of something warm and a sleeping bag).  If all else fails, buy some good ear plugs.

Fifth and finally, try to think through your departure and arrival.   What time of day will you be leaving?  Will your kids be awake or asleep when you're loading up the car?  Will they need a meal right away, or can they wait?  And what's on the other end of your trip - a hotel or a home?  Will food be ready?  Is there a space that the kids can be released from their bonds and allowed to run amok?  Will there be people to help you unload?  Pick up a pizza on the way in if you have to, or take the kids straight to a playground (or fast food playscape, if it's wintertime).  Departures and arrivals won't be like they used to be when it was just you and your sweetheart.  Prepare yourself.

Here's the moral of the story: we do big things with our kids, not because it is easy to do them, but because it's important.

What about you?  Any tips?  Experiences to share?  Warnings for the road?

3.13.2014

Crockpot Superpowers!

You all know how much I love my crock pot, right?  I have recently discovered that it has a hidden superpower: heating up leftovers.

You see, I don't have a microwave (more on that craziness later, if you care to know).  And sometimes, we go out and run errands in the morning, and then we're desperately hungry when we come home.  If I'm sane enough to think of that on my way out, I take a minute to throw some leftovers in the crockpot on high for the couple of hours that we're gone.  Then we can literally eat right away upon our return, which has saved us all some tears and meltdowns (mostly from me.  Tears have reduced by 47.3% since starting this).

I've done it one of two ways, depending on the kind of leftovers I'm heating up.  If it's something that's relatively dry ... quiche, or pizza, or pork chop and potatoes for example ... I wrap it up in foil and just put it in the bottom of the crockpot.  Turn it on high, put the lid on, and come back in two hours to a delicious lunch perfectly heated.  Bonus: cleanup is minimal.  Yippee.

Another way to tackle the heating up is to find a heat-proof dish that fits in your crockpot (I have those freezer-to oven-to table pyrex dishes), fill it up with something a little soupier (pasta and sauce, for example) and put an inch or so of water in the bottom of the crock pot.  Place the heat-proof dish in the water, put the lid on the crockpot, and turn it on high.  And again, yippee skippee for little cleanup and a hot meal.

Perhaps you are thinking, "Why not just put the leftovers IN the crockpot and heat them up that way?"  Well, on low they sometimes don't heat up enough, and on high they sometimes get crisped and weird.  Cleaning up is more challenging.  Trust me on this. But by doing it this way, they are nicely warmed through (even steamed, in the case of the pasta), and about as edible and delicious as they were the first time around.  And you won't have to soak and scrub and soak again and scrape your crock pot!  Win.

Strange?  Definitely.  Helpful?  Hopefully!

3.06.2014

Improv Quilting Class #2

We had another great improvisational quilting class, ya'll.  There's something so inspiring about being creative with other people (especially when those other people are so delightful).  I love the community that builds around working with tangible things in creative ways!

We had a little show and tell (you better believe that these ladies are talented!) and then set to work with a technique I've dubbed "Sew and Slice."  I'm sure some real quilters out there have come up with a better name, but I'm going for the basic descriptive term.

Start like this:

  • Cut strips of the same widths or varying widths (2.5" is a good place to start, though anywhere from 2-3.5" wide is pretty good too.)
  • Sew them together to form stacked strips of fabric (like the one you see on the left, below).

Improvisational Quilting: Sew and Slice
You can either leave it like that as a stacked strip (which is absolutely OK), or you can grab your rotary cutter and slice.  I would like to suggest that you go for the slicing, but be warned: it's addictive.

If you're going to slice it up, here is a place to begin ...

  • Make 1, 2, 3, or 4 vertical cuts to slice the stacked strips into smaller strips.  Rearrange or flip smaller strips, then re-sew into a block.  Look at the photo above on the right: no, I did not cut all those little squares and painstakingly piece them together in a checkerboard pattern.  I just did a sew and slice, and inverted two strips!  
  • If you're trying to do some quilting math, here's a little pointer ... every time you sew something together, you lose 1/4" on each side of fabric for a total 'loss' of 1/2".  So, in the block on the right above, I had it 1 1/2" wider than I really wanted it to be.  I sliced and re-sewed, and ended up with the right size.

If you want to get a little crazier, try this ...

  • Trim your stacked strip to a desired shape (rectangle, square, triangle) and sew white strips of fabric to the sides to make your block as big as you want. (See the triangle/Christmas tree/party hat on the left)

Improvisational Quilting: Variation on Basic Sew and Slice

  • Or, make 1, 2, 3, or 4 straight or diagonal cuts to slice the stacked strips into smaller strips.  Rearrange or flip smaller strips.  Sew solid strips between the pieced strips.  Re-sew back into a block.  (again, on the left)

Improvisational Quilting: Variation on Basic Sew and Slice
And, finally, be prepared to have your mind blown.  This is a technique that two of the quilting buddies played around with to fabulous results.

  • Make lots of little vertical slices (at least 1" apart - either all the same or varying widths) and then re-sew, staggering the seams ever so slightly.  Here's what I mean:
A little improv take on bargello quilts!

  • You'll end up with something rectangle-ish - just trim the uneven edges, add white (to get the size you're going for) or just leave it as-is.  


There you have it, my friends - improvisational quilting a la sew and slice!  Happy day to you :)

PS.  You can see what we were up to in our first improv quilting class by clicking here.  You know, if you are curious.