Showing posts with label modern quilt. Show all posts

11.02.2014

Jacob's Ladder Modern Baby Quilt

It's turning cold - therefore, it is quilt and soup season.

Here's a little baby quilt I was able to put together for some dear friends who are expecting their first in just a few weeks.  Until I get to hug their precious son in person, this little quilt will have to do the trick!

This Jacob's Ladder Modern Baby Quilt measures about 28" x 40".  I pieced small strips on a white background with a faux applique method - no real pattern, just fun piecing!
 It is quilted all over in a meandering free-motion pattern.
 And there - can you see it? - the tiniest of labels!  That's a new addition to my etsy shop!


6.12.2014

Improv Modern Baby Quilt (a quilt for Nibbler)

We've enjoyed lots of special visits with dear family and friends recently - a precious wedding, celebrating a new house, a potluck reunion on a lawn with old friends, walks and playdates and water adventures and more - all kicking our summer off to a most lovely start.

There's another big family event coming soon - "Nibbler," my little neice or nephew, is due in July - and we are all beside ourselves with excitement.  I knew I wanted to make a special little quilt for the newest family member, and dreamed up this idea while I was teaching an improv class earlier this spring.  

I went with a giant stitch-and-flip project, with each white block measuring 9 inches. The final quilt measures about 33" square.  


I love that it looks like just one quilt square!  I've seen a few other quilts that have taken traditional patterns and enlarged them, but this is my first time trying.  It won't be my last.  I am thrilled with how it turned out!

The back is a VERY light green-polka-dot-on-white (that barely shows up unless you're looking for it).


And the quilting - well, I tried something new.  It certainly came together quickly - just up and down loops across each block, with the opposite direction in each colored triangle.  This was a fun one!


Alright, Nibbler - we can't wait to meet you!

3.21.2014

Improv Quilting Class #3


Our third week of improvisational quilting is now completed.  As always, I am astounded by the talent and creativity that I get to work with!  I am only "teaching" this class in terms of facilitating.  They don't really need me (but shhh, don't tell them that).

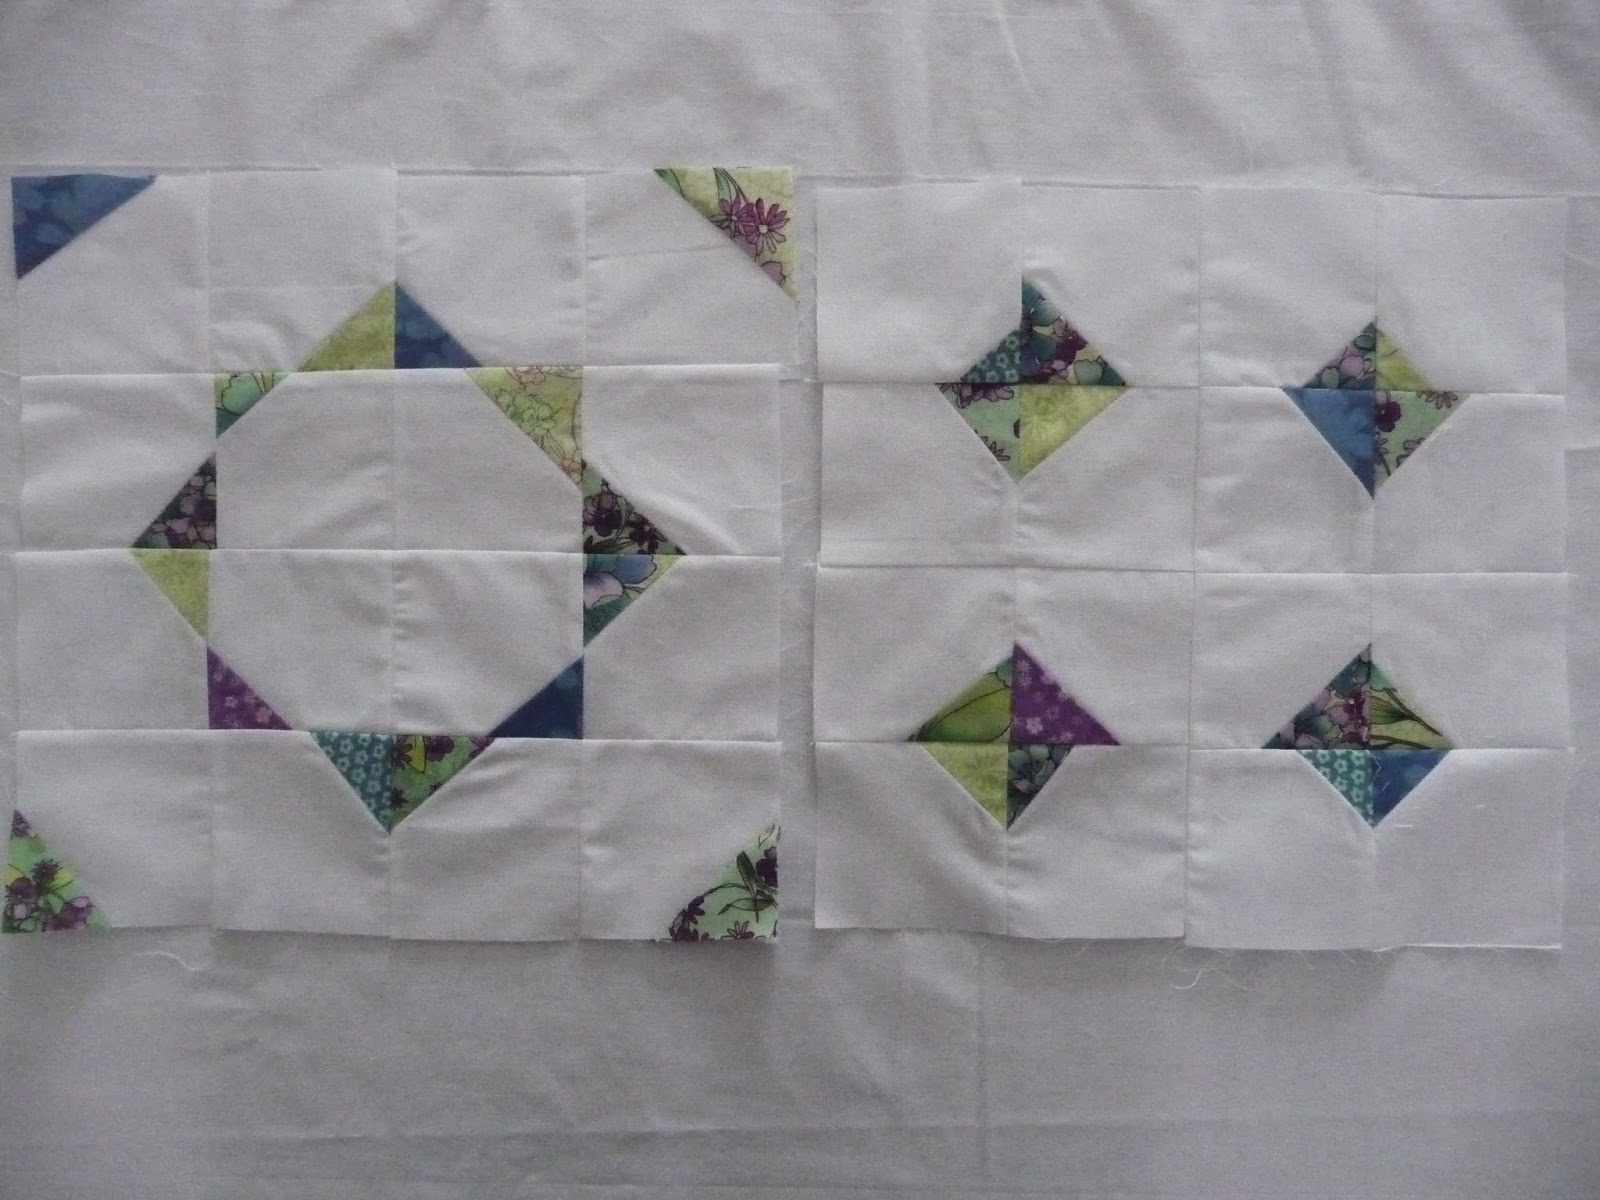
Class #3 was about "stitch and flip" - which may or may not be a real term.  Ha!  I like making things up.  I think it could also be called faux piecing or faux applique (faupplique, if you will).

Start by cutting 16 3.5" x 3.5" white squares.  Take a scrap of fabric of any size (a triangle or rectangle is nice), and with right sides together, sew it to one corner of one of the white squares.  What you want is for the scrap to cover the corner when it's folded over and ironed.  It may take a little bit of eyeballing to get the hang of it (because it feels like you are actually sewing it upside down and backwards).  Repeat with the rest of the squares.

Fold the scraps over to cover the white corner, iron flat, and then trim even with the square.


Arrange 16 squares as desired, sew together, and iron.  Trim block to 12.5"x12.5".


This is how I arranged my two blocks.  You can tell that they are pretty wonky and nothing really matches up - but I'm operating under the philosophy that if nothing matches up, then it looks like it's supposed to be that way!  Don't give away my secrets, please.

I wish I had gotten pictures of everyone's block variations, but I just managed to snap this one.  One of the participants went a step beyond a single stitch-and-flip and went for opposite corners of every square.  Here's what she came up with (I absolutely love it!):


Three more classes to go ... we'll be revisiting the stitch and flip for a second week next time!

3.06.2014

Improv Quilting Class #2

We had another great improvisational quilting class, ya'll.  There's something so inspiring about being creative with other people (especially when those other people are so delightful).  I love the community that builds around working with tangible things in creative ways!

We had a little show and tell (you better believe that these ladies are talented!) and then set to work with a technique I've dubbed "Sew and Slice."  I'm sure some real quilters out there have come up with a better name, but I'm going for the basic descriptive term.

Start like this:

  • Cut strips of the same widths or varying widths (2.5" is a good place to start, though anywhere from 2-3.5" wide is pretty good too.)
  • Sew them together to form stacked strips of fabric (like the one you see on the left, below).

Improvisational Quilting: Sew and Slice
You can either leave it like that as a stacked strip (which is absolutely OK), or you can grab your rotary cutter and slice.  I would like to suggest that you go for the slicing, but be warned: it's addictive.

If you're going to slice it up, here is a place to begin ...

  • Make 1, 2, 3, or 4 vertical cuts to slice the stacked strips into smaller strips.  Rearrange or flip smaller strips, then re-sew into a block.  Look at the photo above on the right: no, I did not cut all those little squares and painstakingly piece them together in a checkerboard pattern.  I just did a sew and slice, and inverted two strips!  
  • If you're trying to do some quilting math, here's a little pointer ... every time you sew something together, you lose 1/4" on each side of fabric for a total 'loss' of 1/2".  So, in the block on the right above, I had it 1 1/2" wider than I really wanted it to be.  I sliced and re-sewed, and ended up with the right size.

If you want to get a little crazier, try this ...

  • Trim your stacked strip to a desired shape (rectangle, square, triangle) and sew white strips of fabric to the sides to make your block as big as you want. (See the triangle/Christmas tree/party hat on the left)

Improvisational Quilting: Variation on Basic Sew and Slice

  • Or, make 1, 2, 3, or 4 straight or diagonal cuts to slice the stacked strips into smaller strips.  Rearrange or flip smaller strips.  Sew solid strips between the pieced strips.  Re-sew back into a block.  (again, on the left)

Improvisational Quilting: Variation on Basic Sew and Slice
And, finally, be prepared to have your mind blown.  This is a technique that two of the quilting buddies played around with to fabulous results.

  • Make lots of little vertical slices (at least 1" apart - either all the same or varying widths) and then re-sew, staggering the seams ever so slightly.  Here's what I mean:
A little improv take on bargello quilts!

  • You'll end up with something rectangle-ish - just trim the uneven edges, add white (to get the size you're going for) or just leave it as-is.  


There you have it, my friends - improvisational quilting a la sew and slice!  Happy day to you :)

PS.  You can see what we were up to in our first improv quilting class by clicking here.  You know, if you are curious.

2.26.2014

Improv Quilting Class #1

Well, it happened again.

Some friends let me coax them into taking another class, this time focusing on improvisational quilting. I know, right?  Who knew that was a thing?  I really considered calling the class "Lazy Girl Quilting" but I wanted to attract participants, not deter them.  So we're going with improv quilting, and it fits.

If you've seen me sew, you know that THIS style of quilting is for me.  Not too much planning?  Only stopping to measure sometimes?  Using scraps?  Count me in.

On top of that, there is very little ironing.  This is a delightful style of quilting, my friends ... and if you've never tried it then I suggest that you set aside your preconceived notions of improvisationalism and turn off your iron.  

Our first class focused on log cabin style piecing.  There are plenty of great tutorials online about log cabin quilts.  I posted my own back in 2010 (start here and here) when I taught my first class (again, to friends.  Wow, I have really awesome friends.)  If you want to see some of the wonky/improv log cabin quilts I've done, they're here, herehere, and (a giant log cabin block) here.


Both blocks have a center square about 3.5" x 3.5".  I say about because the whole point of improv (to me) is to forge right ahead without overthinking little details like measurements and right angles.  The strips all started off 2.5" wide and I trimmed as I went along to add some wonkiness.

The block on the right was pieced exactly the same way as the one on the left, but then I sliced it up with one cut top-to-bottom and one side-to-side.  Then I rotated the top right and bottom left pieces before resewing the block back together.  Boom.  Improv.

Very little thinking, really.  I did iron at the end, just to get it to sit nicely.

Improv Quilting!  Scraps!  Trying new things!  Friends!  I have much to be thankful for.

11.11.2013

Coming Soon: Quilts for Sale

Fun news: I'm reopening my etsy shop soon!

I bet you're sitting on the edge of your seat in anticipation.  I am sure that you've always wanted to own a rhymeswithsmile quilt.  And, I know you've always wished you had a friend who made stuff like this, so you can say, "Oh, yeah, I know the girl who made that."

To help you cope with your excitement, I'll give you a little sneak peek:


More details soon, I promise!