4.30.2013

Mexican Corn Dip

This is one of the appetizer dips I prepared for a friend's fiesta-themed wedding shower.  The recipe is from a friend of the family affectionately known as "Mama Liz."
Makes 1 8x8" dish (4-6 servings)

1 (15 ounce) can Mexican corn, drained
1 (4 ounce) can diced chili peppers
1 c. mayonnaise
1/2 c. shredded parmesan cheese
1 1/2 c. hot pepper jack cheese

Combine all ingredients in a medium bowl.  Pour into an 8x8" glass baking dish and bake at 350 for 20-30 minutes or until it is hot and bubbly.  Alternatively, you can put the ingredients in a crockpot and cook on low or high until hot and bubbly.

Serve with chips or crackers.

If you wish to double the recipe, you can bake it in a 9x13" dish.

4.29.2013

Homemade Queso Dip

This queso recipe comes from my friend Katie, who says this is a family favorite.  I used this as an appetizer dip for the recent fiesta-themed shower I helped throw.

Yield: 8 cups

6 Tbsp. butter, divided
1 white onion, diced
2-3 Tbsp. flour
2 pounds Velveeta, cubed
1 can evaporated milk
1 (8 ounce) package mushrooms, diced
3 tomatoes, diced
1 (4 ounce) can diced green chilies
garlic salt to taste
1 can golden mushroom soup or cream of mushroom soup
1/2 c. salsa

Saute onions in 3 tablespoons butter and set aside.

In a large saucepan, melt remaining butter and stir in flour on low heat, stirring with whisk to get out lumps.

Add Velveeta cheese and melt slowly.  Add remaining ingredients and heat through.

4.28.2013

Chocolate Pound Cake

1 c. (2 sticks) butter
1/2 c. crisco
3 c. sugar
5 eggs
1 c. milk
1 Tbsp. vanilla
1/2 tsp. baking powder
1/2 tsp. salt
1/4 c. cocoa
3 c. flour

Cream butter, crisco, and sugar.  Add eggs.  Sift flour, baking powder, salt, and cocoa.  In a separate bowl combine milk and vanilla.  Add dry mixture to the butter mixture alternately with milk, beginning and ending with flour mixture.  Bake in a greased and floured tube pan or bundt pan at 325 for 1 1/2 hours or until a cake tester inserted in the middle comes out clean.
Invert onto a wire rack to cool.  Transfer to a cake stand or platter and dust with powdered sugar or chocolate icing.

This cake recipe is from my mom's handwritten recipe files ... a friend gave it to her in the early '80s.  It was one of the desserts that we prepared for B's wedding fiesta shower.  No, it's not particularly Mexican in any way.  In fact, it screams American.  But it fed a lot of folks!

You know what I hope happens?  In 30 years, I'd like to make this cake for one of my girls' friends, and share how it's been used through the years to celebrate and fellowship!

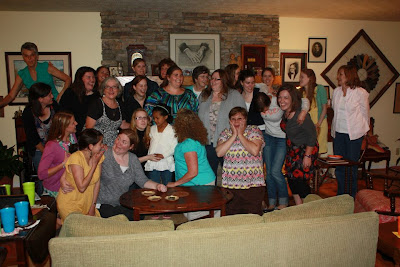
Would you believe that we all have known each other for longer than we haven't known each other?  That's so special!
Bride to be in the middle!
Pretty fun girls to throw a shower with (or for!)

Cinco de Mayo Fiesta Menu


I recently helped throw a fiesta-themed wedding shower for a dear friend, and had such a great time planning, cooking, and eating (of course) that I wanted to share the whole menu!  The recipes that don't have links will be coming up on the blog this week - I'm hoping to squeeze them all in before Cinco de Mayo.  But really, you can have a fiesta whenever you want.  Any reason is a good reason for tasty Mexican food!

The bride-to-be and her mom - such sweet ladies!
The rest of us are sweet too ... and a little kooky
Appetizers:
Mexican corn dip and queso dip with tortilla chips

Entree:
Carnitas: braised and fried pork - served with warmed corn tortillas, chopped onion, chopped cilantro, and lime wedges
Tomatillo Corn Relish: I roasted the corn before adding it to salsa by spreading a single layer of frozen corn kernels on a cookie sheet, drizzling with olive oil, and broiling for 3-5 minutes or until lightly brown in places
Roasted Pineapple Salsa: I nixed the habanero and was going to substitute jalapenos but couldn't find any in the three grocery stores I went to (what, a shortage of jalapenos just before Cinco?  Inconceivable.)
Pico de Gallo: fresh tomato salsa with onions, cilantro, and peppers
Pico de gallo

Guacamole: made with the pico de gallo
Mexican Rice with Cilantro Dressing: ya'll, this was phenomenal.  I'm not kidding.  I may never think of rice the same way.
Poblano Pinto Beans: my favorite way to eat pinto beans!

Desserts (chosen not for their association with Mexican food, but because they were easy, made enough for all the guests, and the orange cake went with the bright color theme)

Mexican Rice with Cilantro Dressing
Guacamole, chopped onion, and sour cream
Queso dip
Left: Roasted Pineapple Salsa
Right: Tomatillo Corn Salsa
Jo's Dreamsicle Cake Trifle
Based on Roberto Santibanez's Taco Night Menu on Epicurious.com

4.26.2013

Chicken Curry and a Blog Party

Recipe slightly adapted Indian Chicken Curry II from allrecipes.com
Serves 4

3 Tbsp. olive oil
1 small onion, chopped
3-4 ribs celery, chopped
3 medium carrots, peeled and chopped
2 cloves garlic, minced
1/4 c. curry powder
1 tsp. cinnamon
1 tsp. paprika
1 bay leaf
1/2 tsp. grated fresh ginger root
1/2 tsp. white sugar
1/2 tsp. salt (more or less to taste)
1 lb. boneless chicken thighs or breast, cut into bite-size pieces
1 Tbsp. tomato paste
1 c. plain yogurt
3/4 c. coconut milk 
1/2 lemon, juiced
1/2 tsp. cayenne pepper

Heat olive oil in a skillet over medium heat.  Saute onion until lightly browned.  Add celery and carrots and cook for 2 minutes.  Stir in garlic, curry powder, cinnamon, paprika, bay leaf, ginger, sugar, and salt.  Continue stirring for 2 minutes.  Add chicken pieces, tomato paste, yogurt, and coconut milk.  Bring to a boil, reduce heat, and simmer for 20-25 minutes, stirring occasionally.
Remove bay leaf, and stir in lemon juice and cayenne pepper.  Simmer 5 minutes more.

We like to eat curry a lot, and I mentioned to a friend recently that I wanted to find a reliably good coconut-based curry dish.  I have been trying different recipes, but hadn't quite found the one that I had in mind.  I just really like the complexity of flavor that comes from the coconut and spices, and just could not replicate the dishes that I like to order in restaurants for myself.  But - aha!  I think I have it!  A million thanks to my kind friend!
Secret ingredients: coconut milk AND tomato paste!
Since this recipe requires adding lots of spices all at once, I combined them all in a little bowl so that I wouldn't have to measure and fumble with lids and small jars while trying to stir.  And, this happens to be my new favorite step in cooking - adding spices to the aromatics - because it toasts them and really brings out a deeper flavor than just mixing them in liquid does.

Please don't be intimidated by the long list of ingredients.  It's actually really simple to throw together!  You probably have most of the ingredients in your kitchen and pantry already.

Remember that today is Blog Party day at Simply Baby Furniture!  Didn't you love the nursery that Beth from DesignPOST Daily showcased last week?  I think my favorite detail of her little girl's nursery is her clothes storage - such a creative use of space (or lack thereof).  Check out today's post by clicking here.


Today's blog party post comes from Tiffany at Tiffany Leigh Interior Design .

And stay tuned for more Friday nursery inspiration from a few other folks!  Today's post by Tiffany will be followed in the coming weeks by posts from Cindi and Emily at Scrappy Love, Heather at Vivid Hue Home, Kelley at Forever's Like a Dream, Elizabeth from Little Black Doorand of course, yours truly ... 

4.19.2013

Spring Blog Party!

Do you know what a blog party is?  It's basically what it sounds like - a party, centered around a theme, with hosts and guests and fun things going on.


I'd like to invite you to a blog party hosted by Simply Baby Furniture!  I'm thrilled that I get to be a style contributor for their blog one Friday coming up (I'll be sure and post details about it).  You should go check out their blog here, where Beth of Design Post Daily was featured today.

If you're planning a new nursery, looking for nursery inspiration, or know someone who is in that mode then this is the blog party for you.  Here are the other style contributors that you'll be seeing there over the coming weeks:
Tiffany Leigh Interior Design -Tiffany
Scrappy Love - Cindi and Emily
Vivid Hue Home- Heather
Forever's Like a Dream- Kelley
Little Black Door- Elizabeth
and of course, yours truly ... 

4.18.2013

Easy Vinaigrette for a Green Salad

1/2 tsp. French mustard
1 tsp. sugar
salt and freshly ground black pepper
2 Tbsp. wine vinegar
10 Tbsp. olive oil
1 clove garlic, crushed
chopped fresh herbs, optional

Mix the mustard with the sugar, then add the seasonings and vinegar, mixing well.  Add the oil, whisking in, and use immediately or whisk again before using.  It will keep in a screw-topped jar in the fridge, ready to be shaken for use.


So, this "Year of Food" thing that I'm doing in 2013 means that every few months or so, we dive into a new regional cuisine.  On a recent post, I shared our fancy Indian dinner we had that wrapped up the first culinary experiment.  That means that we are now in French mode around here, and this little cookbook is already helping us out!  While I have yet to tackle any of the fussier dishes that French cuisine is known (and feared) for, I've been enjoying what this cookbook has to offer.  And, it really is little ... it's literally the size of a postcard.

I'm a fan of the homemade salad dressing.  This recipe makes a subtle and tasty vinaigrette - here's a note in the book about it:  The traditional vinaigrette is one part vinegar to three parts oil with only salt and pepper for seasoning.  For many people that is slightly too acidic and the following version uses more oil and a touch of French mustard and sugar.  The only essentials are to have a first class wine vinegar and oil.  Only sufficient dressing to gloss each salad item should be used; apply and toss immediately before eating.

I got this cookbook from a new book site I joined recently called PaperBackSwap.  It is a useful book exchange program where you "earn" credits for offering books, and "spend" credits when you request books from others.  If you're interested, I'll put in a shameless plug here ... I get credits for referring people.

4.15.2013

A Special Indian Feast: Mughlai Chicken with Almonds and Raisins

Don't let the long ingredient list or the instructions scare you away.  If you're looking for something delicious and a little different, this is worth a try!  It's not hard ... just a little involved.  Invite a friend over to cook it with you!  Or work on it during nap time (the kid's nap time, that is - not yours).
Bay leaves and whole cardamom pods
Serves 6

1-inch cube fresh ginger, peeled and coarsely chopped
8-9 cloves garlic, peeled
6 Tbsp. blanched, slivered almonds
4 Tbsp. water
7 Tbsp. vegetable oil
3 lbs. chicken pieces, skinned
10 cardamom pods
1-inch cinnamon stick
2 bay leaves
5 whole cloves
2 medium onions, peeled and finely chopped
2 tsp. ground cumin
1/4 tsp. ground cayenne pepper
7 Tbsp. plain yogurt
10 oz. light cream
1 1/2 tsp. salt
1-2 Tbsp. golden raisins
1/4 tsp. garam masala

Put the ginger, garlic, 4 tablespoons of the almonds, and the water into a blender and blend until you have a paste.

Put the oil in a wide pot or deep frying pan and set over medium-high heat.  When hot, put in as many chicken pieces as the pan will hold in a single layer.  Let the chicken pieces turn golden brown on the bottom.  Now turn all the pieces over and brown the second side.  Remove the chicken pieces with a slotted spoon and put them in a bowl.  Brown all the chicken this way.

Put the cardamom pods, cinnamon stick, bay leaves, and cloves into the same hot oil.  Stir and fry them for a few seconds.  Now put in the onions.  Stir and fry the onions for 3-4 minutes or until they are lightly browned.  Put in the ginger/garlic/almond paste from the blender and the cumin and cayenne.  Stir and fry for 2-3 minutes or until the oil seems to separate from the spice mixture, and the spices are lightly browned.  Add 1 tablespoon of the yogurt.  Stir and fry it for about 30 seconds.  Now add another tablespoon of yogurt.  Keep doing this until all the yogurt has been incorporated.

Put in the chicken pieces, any liquid that might have accumulated in the chicken bowl, the cream, and salt.  Bring to a simmer.  Cover, turn heat to low, and cook gently for 20 minutes.  Add the raisins and turn the chicken pieces.  Cover and cook another 10 minutes or until the chicken is tender.  Add the garam masala.  Stir to mix.

Put the remaining almonds on a baking pan under the broiler and lightly toast them, tossing frequently.  Sprinkle these almonds over the chicken when you serve.  Note: the whole spices in this dish should not be eaten.

Do you remember this "Year of Food" thing I blogged about in January?  Basically, we're trying new ethnic cuisines in 2013 - tackling recipes and ingredients that are not in our normal repertoire so that we can learn about and enjoy other cultures through food.  The first three months of this year we ate Indian food about once a week.  This delicious dish was our last in the Indian series.  We'd been talking with a friend who is quite a fantastic cook how great it'd be to try some dishes together.  He brought some ingredients and we spent a couple of hours cooking together.  The final product what such a feast that we all ended up with full bellies and enough leftovers for another meal or two.

This is a Madhur Jaffrey recipe (she has a few cookbooks out there - can't remember exactly which one this comes from).  I don't have the recipes for the other dishes we ate, but there was a simple dal, a spiced potato and cauliflower dish, yogurt with walnuts and cilantro (and some surprisingly bold serrano peppers), and naan bread.  For a dessert, I made Malai Kulfi, which is an Indian ice cream dish, with cardamom and cinnamon.  It was a very rewarding way to end our first culinary experiment!

Alright, farewell Indian food!

Next up: France.  I am more familiar with French food than I was with Indian food, but there are still some techniques that I will have to work on ... like how to end up with an omelette that looks like an omelette, and not like scrambled eggs with stuff in it.  Here's to trying something new!

4.10.2013

Easy Easter Dresses


I made Big Girl's dress using the "Back To School Tunic Dress" tutorial at Sew Mama Sew.   I like dresses that don't have zippers ... I think they're too fussy for toddlers.  Maybe when she's in high school (if she wants anything I make by then), we'll consider zippers.

Here's the fun part ... the flower patterned fabric is from a thrift store skirt I cut up.  The blue on the sleeves used to be a sheet, and the yellow was a pillowcase.

And here's Baby Girl's dress:


I used the same fabrics so that they could be coordinating without being too matchy matchy.  For a pattern, I copied a simple a-line infant dress that I had.  I used snaps at the shoulders, but could have just as easily done buttons and a buttonhole.


Happy Easter (maybe a little late ... )!

4.09.2013

The Youth Group Cooking Night: Toffee and Pizza

Saltine Toffee 
makes 1 cookie sheet of toffee; briefly feeds a handful of teenagers

4 ounces saltine crackers (1 sleeve)
1 cup butter (2 sticks)
1 cup dark brown sugar
1/2 package semisweet chocolate chips
1/2 cup whole or chopped nuts (peanuts, pecans, walnuts, etc), optional

Preheat oven to 400 degrees.
Grease foil and line a cookie sheet with it.  (You can use a 9"x13" cake pan in place of a cookie sheet if needed)
In a saucepan combine the sugar and the butter.  Bring to a boil and boil for 3 minutes, stirring constantly.  Immediately pour over the saltines and use a rubber spatula to spread it to cover the crackers completely.
Bake for 5 minutes.  Remove from oven and sprinkle chocolate chips over the top.  Let sit for 5 minutes.  Spread melted chocolate.  Top wth chopped nuts if desired.  Cool completely and break into pieces.  Toffee can be stored in the fridge or freezer.


Fruit Pizza
makes 1 pizza; again, briefly feeds a handful of teenagers
recipe for the filling is from The Life of a Wife

1 roll sugar cookie dough
8 ounces cream cheese, softened (1 package)
1/2 cup powdered sugar
1/2 teaspoon vanilla extract
2 tablespoons milk or cream
berries and sliced fruit

To make the cookie crust, slice the sugar cookie dough into even 3/8" slices and place them on a rimmed round or rectangular cookie sheet.  Using your fingers, press the dough gently to bring it together.
Bake at the temperature recommended on the package for 20-30 minutes, or until dough is set and slightly brown.  Cool completely.
To make filling, beat together the cream cheese and powdered sugar in a bowl on medium-high speed until smooth.  Blend in vanilla and milk or cream.  Spread the cream cheese mixture over the cooled crust, and top with fruit.  Slice with a pizza cutter to serve.


We just had the youth group over for a "baking night" over the weekend.  I think I had forgotten how much fun youth groups can be.  These girls and guys were engaging, kind, and had a lot of interesting things to talk about.  I am already looking forward to the next time we get to host something like this!

I split them up into two groups by having them select various kitchen utensils that were going to be used in one recipe or the other.  That also determined their job and the partner they would work with.  We talked through each recipe step by step, discussed the timing of things, and then put them to work.  I did also decide to mention a few safety tips, hoping that no essential body parts (or nonessential for that matter) would be lost on my account.

The saltine toffee is a favorite of mine that my friend Mary introduced me to a number of years ago (in fact, it's in the first edition of The Blacksburg Wives cookbook).  What's so great about it is the short list of ingredients that I typically have on hand - so if I need something that's a special treat, I don't have to scramble around.  I recently tried it with chopped pecans instead of saltines (going for a gluten-free option), and am thinking of other twists on this favorite like substituting other kinds of baking chips for the chocolate chips - like butterscotch, white chocolate, or peanut butter baking chips.


The group that was in charge of the toffee made two batches, one with peanuts on top and one without.  By the end of the night, there were a few flakes of crackers and a ball of foil left on the table.  I'll take that as a sign of success!

The pizza folks really did a fantastic job from start to finish.  The filling was so light and fluffy, with just enough sweetness to complement the fruit without overwhelming it.  The one challenge we faced was that my cookie sheet did not have a rim on it, so we ended up with some unexpected cookie on the oven rack.  Lesson learned - use the rimmed sheet.

I recently saw a "cooking class" birthday party theme floating around on pinterest and I think either of these recipes - or both - would be excellent choices for such festivities.

4.02.2013

DIY Artisan Bread - Without a Dutch Oven

Man, oh, man.  

I tried this recipe, then I made five loaves of bread in four days.  

I couldn't stop!  It's so delicious, and a lot easier than the final product would make you think.

Artisan Loaf, adapted from here and here (this is the original dutch-oven loaf, I believe)

3 c. unbleached, all-purpose flour
1 1/2 tsp. salt
1/2 tsp. yeast
1 1/2 c. water

In a large bowl, stir together flour, salt, and yeast.  Pour in water and stir until combined.  Dough will be "shaggy" (I love that description.  Once you do it, you'll see what I mean).  Cover with an inverted plate or plastic wrap and set it aside in a warm place to rise for 12-18 hours.  This is so important to get the best flavor.  Longer rise time = more sourdough-y taste.
I preheat the oven, then turn it off before putting in the dough.
Perfect place to stay undisturbed!
The dough gets bubbly!  This is exactly what you want.
And now, an aside.  Pretend that we're talking and I just remembered something I wanted to tell you in the middle of an otherwise normal stream of thought.  I've had my eye on loaves of bread like this for a while.  I also thought that I would have to purchase an enamel-coated cast iron dutch oven in order to do it.  I'm all about nice kitchenware, but hadn't quite figured out how I could really justify spending $250 for the dutch oven I wanted.  I knew that baking this bread in a pot with a lid is the key to the crusty crust and chewy crumb, but I thought I had limited options.  

But then I got to discuss the art of artisanbreadmaking with Jessica over at Fifteen Evergreen.  She said it could be baked in anything ovenproof, as long as it has a lid!  I made two loaves the very next day.

I have a 2.5 quart round Corningware dish with a lid - that's my first choice for baking this bread until I find a Le Creuset at Goodwill for $10.00.  (By the way, if YOU find one at Goodwill before I do, please think of me.  I'll pay you back!)


I said I made two loaves at once.  I used the Corningware dish for one loaf ... and this for the other:

Yes!  A loaf pan inverted onto an identical one.  
Now you know that you can make awesome, delicious, artisan bread without a dutch oven.  You just need something ovenproof with an also-ovenproof lid.  Or, you can always borrow Jessica's dutch oven ... 

Now, I'm going to go back to the recipe.  Remember, dough rises for 12-18 hours, etc.  

When you are ready to bake, preheat oven to 450.  Put your baking dish (dutch oven or otherwise) in the oven with the lid for 30 minutes.  

Meanwhile, scrape your dough out of the bowl onto a heavily floured surface.  Fold it over on itself a few times.  Cover and let rest until the 30 minutes of dish-heating is done.

After 30 minutes, remove the dish and lid from the oven.  Dump in the bread dough (I prefer seam-side down, but you can do whatever) and replace the lid.  Bake for 30 minutes, then remove the lid and bake for another 15-30 minutes or until loaf is brown and done.


Remove from oven and place on a wire rack to cool.See, I told you it was easy!

homemade artisan loaf of bread!  
My last set of posts were about making dough ... seems only fitting to follow up with making this kind of dough!