3.26.2012

Finished Square in a Square

Finally finished the "Square in a Square" quilt ... you know, the one with the sketchy directions on notebook paper?  Yes ... it's done!  I got to give it to a friend at her baby shower - now, we're all just waiting on their little baby to show up!


I ended up changing the fabric layout just a little bit from the original picture I posted.  And I'm so glad I did!  I'm really pleased with the simplicity of it, and the movement of the colors.  

And of course, I'm in love with the giant yellow stripes for the backing.  I can't get enough!  I free-motion quilted the entire quilt, and bound the edge in white.  I did a little label on the back of the quilt using this method that I tried out a few months ago.  So easy.  I think it's a new thing I'll do.


Oh, and I have to throw this in for good measure.


Baby Girl > giant yellow stripe quilt backing

3.25.2012

It's official!


We get to move ... to Connecticut!

Come visit, OK?

2.26.2012

Crockpot Burrito Roast

Easy Burritos - from Southern Living, February 2004

1 large onion, sliced into rings
1 (3-4 lb) sirloin beef roast
1/2 c. water
2 (1.25 oz) envelopes taco seasoning mix, divided (or 4 Tbsp. homemade fajita seasoning mix, divided)
flour tortillas

Place onion in a crock pot; add roast and 1/2 cup water.  Sprinkle 1 package (or 2 Tbsp) seasoning mix over top of roast.
Cover and cook on high 5 hours (this is what the original recipe says.  What I did instead is cook it on high for 3 hours, and then cook it on low for another 11 hours - which was overnight + church).  Remove roast, and shred with 2 forks.  Return to slow cooker, and stir in remaining taco seasoning mix.  Cover and cook on high 30 more minutes or until boiling.

To serve, spoon seasoned roast evenly down center of flour tortillas.  Top with tomatoes, onions, lettuce, salsa, sour cream, and/or cheese.

This has been a special weekend for our family - the baptism of our sweet daughter.  We celebrated today with our loving family and friends - both at church, and at a luncheon afterwards where we had burritos.  You might be thinking "Hm.  Burritos for Sunday Lunch?  Never."  Well, I happen to know that tex-mex is always a favorite for our families/friends, and that it was the one kind of food I could prepare 100% ahead, so I wouldn't be rushing about the kitchen while I should be enjoying fellowship instead.

I diced all my veggies on Friday (tomatoes, peppers, onions, and lettuce), bought shredded cheese so I wouldn't have to bother with that, and cooked giant batches of seasoned rice and black beans.  On Saturday, I prepared the roast.  Sunday morning, I put the rice and beans in the oven to warm during church, and the roast stayed hot in the crock-pot.  Besides pulling out the sour cream, cheese, and guacamole from the fridge, it was all done.  Amazing.

And now, some pictures.


Our sweetheart

Thanks for being here, grandparents!


maybe my favorite picture from the whole day

she passed out in the nursery afterwards ... she's NEVER done that before!


2.23.2012

vintage quilt winner

Congrats to Cat in Berlin ... she wins the vintage quilt, and soon will be doing her part to spread American Antiquities all over Europe.  Hooray to you!

And stay tuned, folks ... for more news and information (and cute baby pictures) from here!

2.18.2012

Vintage Quilt + Giveaway!

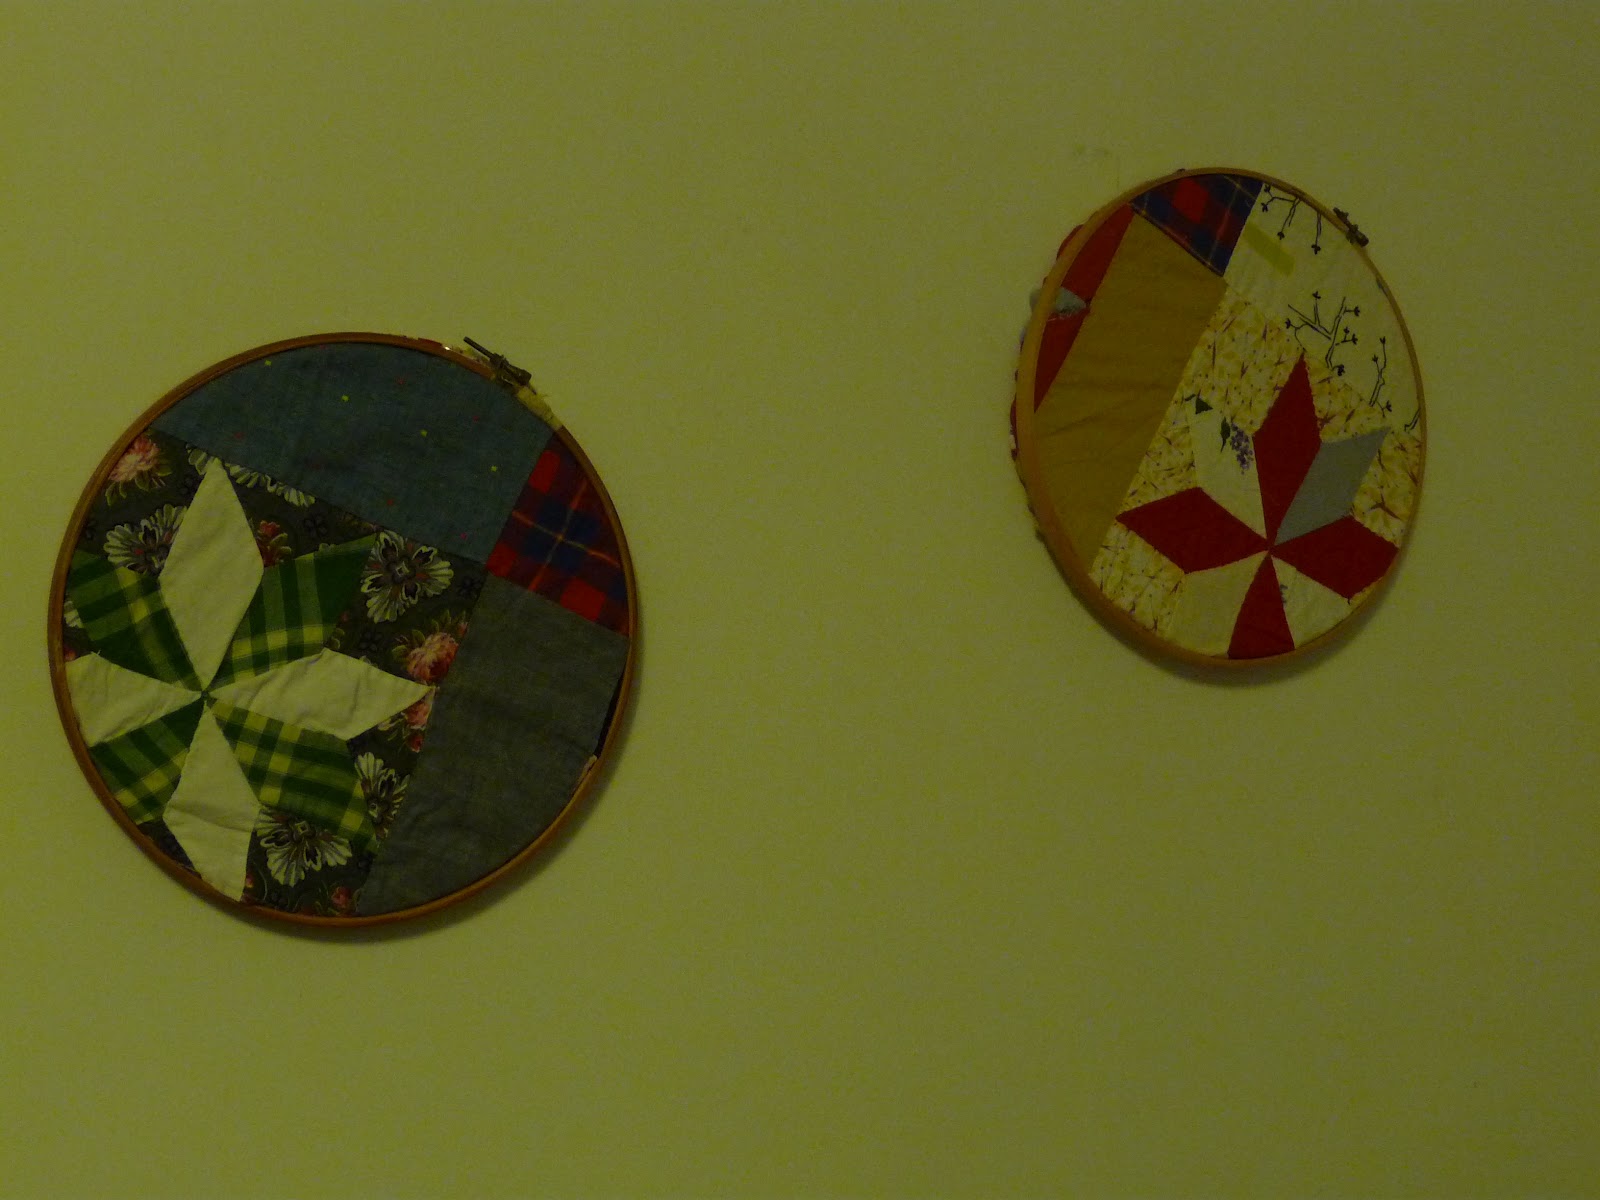
Today, I came in possession of an old, hand-sewn star quilt.  Sah-weet!  I'm a sucker for antique patchwork.  This is so awesome!


But I have to confess: I do not have the time to fix the places where seams have come apart, nor do I have the energy to be that particular.  So, I opted for the quick-and-awesome choice: wall hanging!


That's right.  Those are embroidery hoops, and I cut up (gasp!) the quilt to fit the hoops.  This way, I get to enjoy their handmade beauty every day, and didn't have to do any fixing of seams.  Furthermore, when I have a house with my own sewing room (cough IhopeyoureadthisMr.rhymeswithsmile cough), these can go on the walls of that room.  Until then, they're next to my side of the bed.  So I get to see them first thing every morning!

And, next ... a little bit of fun.  I only cut up half the quilt to use in my wall hangings.  So, I still have half the quilt that I'd like to pass along to someone who wants it.  It's 18 squares (3x6) and three of the sides are hemmed (it's pictured above ... the second picture from the top is a pretty good view of what's there).  Measures maybe 30"x60".  So, leave a comment, and tell me why you want it.  I'll randomly pick someone next Wednesday at 5:00.  I hope it's you!

Finally - Little Girl!  Look how precious.
Maybe she looks like me?

She really is happy most of the time.

something in the basket was funny, I guess.

It has been determined:
She looks like her dad (and I believe
she's wearing one of his old shirts)


2.03.2012

Square in a square

First: tear blank paper from the mister's journal.
Second: Doodle.


Third: Cut fabric, and lay it out in desirable pattern.


Fourth: write down some instructions.  But not a ton of them.  Assume the blog reader is smart and capable.


Fifth: Snap a picture of the backing for the quilt - wide yellow happy bright stripes!  Use quarter for scale.  Then use quarter to start a load of laundry.


Sixth: Sit on the couch and catch up on Hulu instead of sewing through the night.

What a great Friday.

1.26.2012

MK's birthday quilt

I have a friend named MK.  She's fabulous, and she's one of the big reasons why I love the community and town I live in.  We first met three years ago, and our first friend date involved me dragging her around from store to store in search of the perfect black dress (note: we both hate to shop.  and it was raining.).  I'm happy to say it's all be uphill since then: no more shopping, and lots of blueberry and raspberry picking.

She's a gem - really, absolutely, awesomely so.  I'm thankful for this gal in my life!

So, as the world's smallest token of friendship and birthday love, I made her a birthday quilt!  I'm excited at the final product, though I did run into some snags along the way.  (this quilt was inspired by Elissa's first-ever quilt!)

This was my first time trying quilting lines so close together over a whole quilt as well as making my own label for the quilt.

MK's birthday quilt - front (swaying in the wind a little bit)
back of quilt - detail

first time ever labeling a quilt like this ... so much easier than I thought
The quilt measures about 48"x48" and uses fabrics from all my previous projects (I will award you seven points if you can cross-reference at least three of the fabrics you see).  I used a blue-and-white striped sheet on the back, cut to size.  For the label, I used a little scrap of double-sided iron-on interfacing (I used Wonder-Under) on a scrap of white fabric.  I wrote the label with a permanent marker and ironed it to set the ink.  I ironed the label onto the quilt and secured it with a blanket stitch for looks.  So much easier than I thought it would be!

I'm excited to celebrate my sweet friend today!