8.18.2010

Only two things that money can't buy ...

Listen to the whole thing.  The refrain is my favorite ... 


And now, drumroll please ..............
................
................
................


World, I present to you the first home grown tomato of our garden! In my fit of excitement I forgot to wait for the Mr. to come home to pick it with me, so I feel really bad and am very very VERY penitent. Can't you see the guilt and remorse on my face?

8.17.2010

Freezer Salsa

This picture doesn't QUITE do the overgrown garden justice, but we'll try. 
You can see sweet Mr. rhymeswithsmile hard at work pulling weeds.
As previously mentioned, some of those weeds were 4 feet tall and required some quite vigorous pulling (thankfully, the rain loosened the soil).  The most fun part of the three-day adventure was searching for the purposeful plants under all those crazy wild ones - and actually finding them.
The Mr. took the weedeater and rescued about 30 tomato plants and 15 pepper plants.  We also uncovered 3 watermelons, and in the past week have seen 4 more come out. 
And just think ... we believed the garden was a goner ...

But, back to tomatoes and peppers ... I ended up buying (eek!) the produce to make my first batch of freezer salsa because I wanted to make salsa so badly I couldn't wait for our own tomatoes to ripen.  I found a nice old man with a truck on the side of the road (he was the one who provided the gigantic Tomatolator I got so excited about last posting), and for a whopping $25 ended up with all the ingredients I needed for the salsa.

So, if you find yourself either (a) buying 20 pounds of tomatoes at a time or (b) overwhelmed by your own garden produce, try this recipe for freezer salsa.  It made about 15 pints of salsa (which means, if we ration well, we get one jar of homemade salsa every 3.5 weeks until next summer!)

Diner's Freezer Salsa
from www.food.com - recipe #12275
20 pounds fresh tomatoes
2 cups fresh cilantro
2 large onions
10 garlic cloves
10 medium jalapeno peppers (if you're OK with a little kick in your salsa)
6 habanero peppers (to taste - I actually used a different kind of hot pepper and am satisfied with the results, so feel free to adjust depending on what you like and what you have access to)
2 cups chopped green peppers
2 tablespoons cumin
1/4 cup sea salt
1/4 cup white vinegar
juice of 6 large limes

Chop tomatoes in food processor - do not puree.  Leave some chunks.  (the original recipe says to peel the tomatoes first.  I don't feel that it's necessary or worthwhile to do it ... but whatevs.  Call me lazy, but I don't bother with it.  You can peel if you want before processing the tomatoes).  Pour into a large - very large - stock pot.

Chop cilantro, onion, and garlic coarsely in food processor, and add to tomatoes.


Chop peppers - jalapenos with seeds, habaneros and green peppers without seeds - and add to tomatoes.

Stir cumin, salt, vinegar, and lime juice into tomato mixture.  Combine thoroughly.


Bring to a boil.  Lower temperature and maintain at a low boil for 2-3 hours, stirring occasionally to prevent sticking on the bottom.  You want the salsa to reduce by about half as the tomato water boils off.

Wash jars and lids in hot soapy water and rinse.  I use glass pint jars and metal lids and bands, but the original recipe writer says she used 3-cup plastic freezer containers.  Just keep in mind that you want usable container sizes - so don't pour your salsa into gallon ziploc bags unless you plan on defrosting and eating a gallon of salsa at a time.

Fill jars with salsa, leaving about 1/2 inch to 3/4 inch space at the top for expansion during freezing.  Let jars completely cool before putting on lids - this way you avoid condensation and ice on top of your salsa.  Keep in freezer and thaw before eating.

I get a little smile when I open up our freezer and see an entire shelf of salsa.  And, I confess that I will probably end up hiding half the jars from the Mr. because he loves this salsa so much, he'd eat a jar a day.  So, some of the jars are visible.  The rest are nicely tucked away under potato soup, blueberries, and frozen corn, to be pulled out in mid-February when I need a little boost ...

8.04.2010

Tomatolator

(no, it's not from my garden.  Are you kidding me?  This gigantic beauty is from a nice old man with a produce truck on the side of the road.  He charged me a whopping $0.95/lb for this German Pink.  The Mr. said it looked like an old lady without any teeth.  I said it looked like it would taste really good.  It was absolutely incredible.  You should go find one.)

7.31.2010

garden update

The garden was so bad ... 


... that we had to sort through 4-foot weeds to find the metal tomato cages


... we followed the hose to find the sprinkler and pulled weeds around it so the water could shoot up


... we had all but given up hope of getting any produce from the dry, weedy, deer-eaten plot


... my lazy (albeit pregnant) self could not muster the motivation to do anything out there.  Gnats + heat + gnats + dry dirt + gnats + millions of weeds = recipe for sitting inside.


But there's good news: Mr. rhymeswithsmile has a weedeater.  And it's RAINED for the first time in a very long time.  And it's below 75 degrees.  All of this means that we are in the process of hacking through a 40'x40' weedfest to find our precious, sweet, incredible tomato and pepper plants.  We've discovered watermelons too.  I picked a squash and have one more on the horizon (it's ripening for another day or two).  Joy!


Weeding - under the right conditions - is encouraging work.  It's satisfying in a way that I don't know how to explain.


We have food in our garden!  

7.29.2010

just squash it

Curried Squash Soup (adapted from a recipe that I found last night but can't find now.  I'll give real props when I can properly locate the source)


1 Tbsp. olive oil
1 medium onion, chopped
3 cloves garlic, coarsely chopped
1 hot chili pepper, seeds removed, chopped
1-2 Tbsp. curry powder (depending on your taste)
4 6- to 8-inch yellow summer squash, cut into 1/2-inch slices
4 c. chicken broth


Heat oil in a large pot over medium heat.  Add onion, garlic, and pepper and saute 3-5 minutes or until onion is translucent.  Sprinkle curry powder over onion and garlic, and stir to coat.  Throw in the squash and stir in the broth.  Bring to a boil, cover pot, and reduce heat.  Simmer soup for 20-25 minutes or until squash is soft.


Let soup cool and then puree in blender or food processor.  This is a light summer soup that could be served hot or cold, with sour cream or yogurt stirred in.


I would've taken a picture of this, but if you have ever cooked with curry you know that it can ... well ... turn foods funny colors.  It didn't look very appetizing, though it tasted amazing.  I sound like I'm trying to talk you out of making this soup, but really I'm not.  Just try it.  And wear dark sunglasses if you're highly sensitive to the way your dinner looks before you ingest it.


I've got yellow squash on the brain these days.  Somehow, I have the ONLY garden in the state that has produced a million squash flowers without actually producing any fruit (whoops, that's a lie.  So far: 1 squash out of 18 plants).  So, I've been the recipient of other people unloading squash on me.  Last night, I found that I had 12 yellow squash to process, along with 2 pounds of hot peppers, 10 pounds of apples, 8 green peppers (though they were relatively small), and one pint of cherry tomatoes.  I made a giant bowl of applesauce.  The tomatoes and green peppers aren't a problem.  The squash and hot peppers are a different story, so my goal over the next few days is to hide squash in as many recipes as possible (Chocolate Squash Cake, anyone?), and figure out what to do with two pounds of hot peppers.


Besides Chocolate Squash Cake (substituting shredded squash for zucchini in a recipe like this one), I've been thinking of Squash-Potato soup, Apple-Squash bread, and a stir-fry or two.  That should take up the 8 squash I have left, right?

Any thoughts on the hot peppers?

And now, for something completely different: a Mr. Rhymeswithsmile-themed potluck picture (to welcome him home from his trip out West) ...

... he showed up 5 minutes late for the picture ...

7.12.2010

Olé!

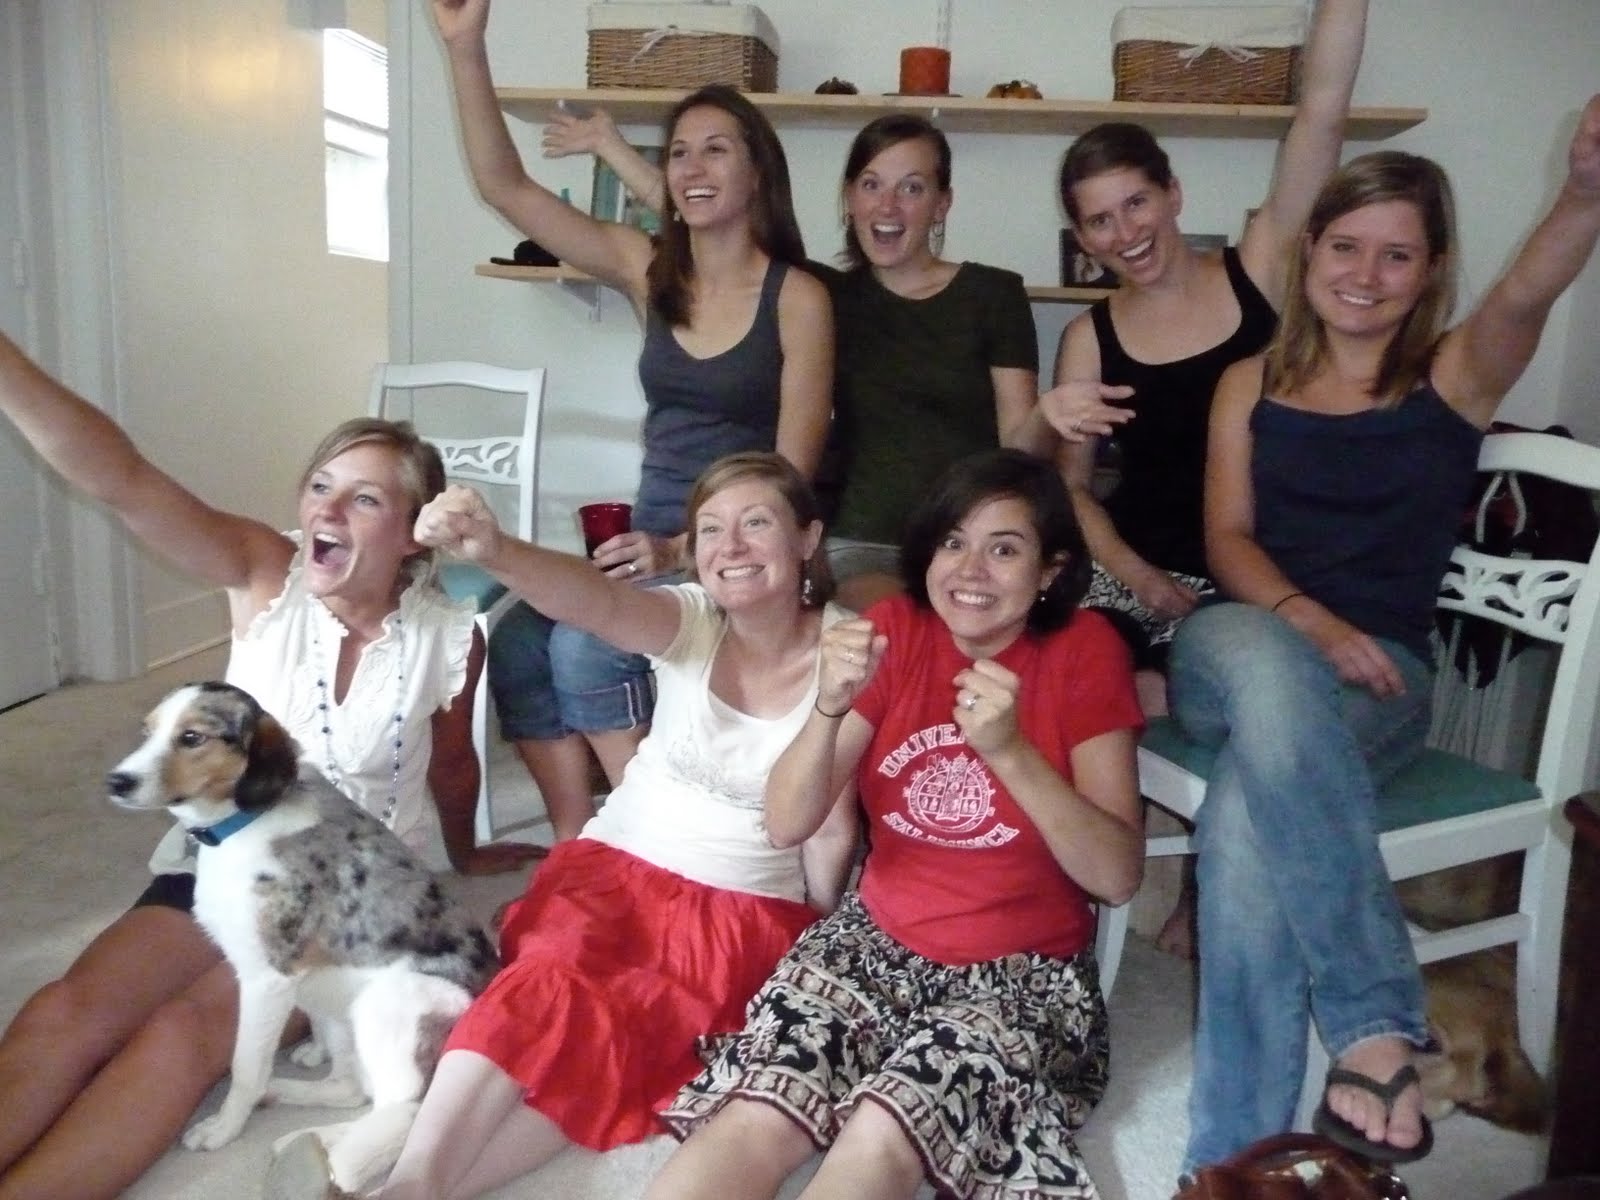
This is the World Cup final party.

This is the Meredith (wearing a white shirt) that hosted the World Cup final party.

This is the recipe for croquetas that I prepared for the World Cup final party that Meredith (wearing a white shirt) hosted.

This is the rest of the Spanish food that others prepared that loaded up the kitchen table for the World Cup final party that Meredith (wearing a white shirt) hosted.

These are the friends that ate the croquetas that I prepared for the World Cup final party that Meredith (wearing a white shirt) hosted.

Feel the intensity among the friends that cheered on Spain during the World Cup final party that Meredith (wearing a white shirt) hosted.

There's no picture of the husbands who came to the World Cup final party that Meredith (wearing a white shirt) hosted.  But they ate the food that we all prepared that loaded up the kitchen table for the World Cup final party that Meredith (and I guess I should mention Danny) hosted.

This is the joyous outcome of the World Cup final party that Meredith (jumping up and down) hosted.

This is a picture completely unrelated to the World Cup final party that Meredith (wearing a white shirt and jumping up and down) hosted.  But based on the awesomeness of Spain winning their first-ever World Cup title, maybe now you can understand why we've decided to name the baby Iniesta Torres Villa Fabregas Puyol.
(15 weeks)

7.07.2010

Wonky Log Cabin Tutorial #6 - The Last One!

Last week you finished your quilting, right? 
If you (still) need inspiration about what quilting pattern to use, look at Val's quilt here ... check out those groovy grid lines that form a diamond pattern.  I'm so excited about how hers turned out!

Feeling a little more adventurous with quilting?  Look what Andrea did:

Talk about groovy!  I love the swirls! 

Alright, this last binding tutorial is actually going to be a combo my-tutorial/other-blog-site-tutorial.  I don't feel the need to reinvent the wheel when it comes to binding tutorials.  And Amanda Jean over at Crazy Mom Quilts happens to have an excellent, step-by-step binding how-to.  So, check it out by clicking here, then come back to visit me so we can talk through it again.  (By the way, while you're there, look at her other quilts and be inspired!)

The binding is the very last thing you do to your quilt.  It finishes and hides the edges of fabric and batting that are still exposed, so it's worthwhile to do a quality binding.  If you haven't already, read through CMQ's tutorial and then read on:
Step 1: Measure the four sides of your quilt, add it up, and add 12.  Cut enough 2.5" wide strips (she does 2.25" but it's your choice - either width, just be consistent for all strips) to add up to that measurement.  Sew them together on the short sides so you end up with one long strip.
Step 2: Iron the long strip in half lengthwise with wrong sides together.  You should have a very, very long, very, very skinny strip.
Step 3: Match unfinished edge of quilt with raw edge of binding strip, and sew on around all four sides and corners.  (crazymom's tutorial is excellent for this step, especially for the corners.  Haven't read it yet?  You know what I'm going to tell you to do.  So just go do it.)
Step 4: Trim the edges of the quilt even with the binding strip edges.  Fold the binding over onto the other side of the quilt around the edge and sew it down with a needle and thread (by hand!)
Step 5: Enjoy this awesome quilt you just finished, and graciously accept compliments from your friends who can't believe how crafty and cool you are.

Alright, well that's it for this 6 part tutorial on how to make a wonky log cabin quilt!  Hooray for friends and quilting classes!  And thanks to the lovely women who have great taste in fabric and incredible talent - I loved working with you all!

A few more pictures:
Laura's quilt - still in progress
(she was out of town for a couple of weeks without a machine)

Caitlin's quilt (picture from last week)

Caitlin sews on her binding strip

A second wonky log cabin quilt that I'm working on finishing up
(the green border now goes all the way around the quilt)