4.25.2014

Pasta Aglio e Olio (Pasta with Garlic and Olive Oil)

from The Top One Hundred Pasta Sauces by Diane Seed

1 lb. spaghetti (or other pasta - as you can see, I used egg noodles here)
salt
6 Tbsp. olive oil
5 cloves garlic
1 small chili pepper
parsley, optional


Cook the pasta in boiling salted water, following the directions on the packet to avoid overcooking.

Meanwhile, heat the olive oil and add the garlic (I have found that a lower temperature is better - I'd say go for medium-low heat).  This is either left whole and removed before serving or it is finely chopped and not removed (I take the second approach).  Add the chili pepper which has been cut into 3 or 4 pieces, cook until the garlic is golden brown.

The moment the pasta is ready, drain it and put into a large serving bowl.  Remove the chili and garlic (if left whole) from the oil and pour the sizzling oil over the pasta, stirring well.  There must be sufficient oil to coat every strand of pasta and make it slippery and shiny.  Add chopped parsley if desired and serve immediately.

Confession: I thought that I had posted this months ago, and then I went looking for it and realized I had been depriving you!  I am so sorry.  I'm trying to make amends though.

This is a quick and relatively easy meal that I literally threw together the other night in about 20 minutes.  The most challenging part (for me) is finely chopping garlic, but that's it!  Oh, the other part is explaining to people you might see after you eat a bowl full of this why you smell so garlicky delicious.

If you happen to have extras around - say, some grape tomatoes, chopped/cooked chicken, or olives - this sauce is very accomodating.  Of course, some would say it's not "aglio e olio" anymore when you add that, but I'll let you call it what you want.  It's that simple, though - heat garlic in oil, pour it on pasta, and stir it up.  Now you see why I needed to share this, right?

4.21.2014

Handwritten Recipes: Aunt Viola's Heirloom Banana Bread

In case you're wondering, the 'i' in 'Viola' is a long vowel sound - not like the instrument.  Say it with me: "Vie-OH-lah."  Yes, that's it.  Aunt Viola was my great great aunt, my great-grandmother's sister.  This recipe has made its way to my hands via my most excellent cousin Becky.  She knows me well (for proof, look closely at what's in parenthesis beside the chocolate chips in the ingredient list).  Cousin Becky, you're a winner.  


Aunt Viola's Heirloom Banana Bread

1 c. sugar
1/4 tsp. salt
1 stick butter
1 tsp. baking soda
2 eggs
4 mashed bananas, frozen then thawed (this is extremely important.  Don't you dare use fresh bananas)
1 1/2 c. flour
1/4 c. nuts (optional)
1/2 c. chocolate chips (not optional)

Mix until well blended.  Stir in chocolate chips and nuts.  Pour in greased loaf pan.  Bake at 350 about 1 hour or until cooked through.


What's been keeping us busy, you ask?  Besides, of course, making and eating banana bread, naturally. 


Well, things like this: a 17-month old who's chatty and likes to pull books off of shelves (and then smiles a melting smile and flashes those blue eyes) - and preparing for my first ever CRAFT FAIR on Saturday 4/26 - and getting a community garden plot (20'x20' of local investment!) - and trying to firm up some farmer's market plans.  Oh, and neighbors and friends and visitors from out of town and local restaurants and spring time and surprise snows and kids.

Just a few little things.  But there's always time for family, and Aunt Viola's banana bread.  Naturally.

4.11.2014

Handwritten Recipes: Chicken Potpie

This recipe comes from my friend Sara in Virginia - she's also got two little girls and a knack for the handmade!  She posts on a 52-week project blog called Rocktree Creations (it makes my little heart pretty happy).  Thanks for sharing, Sara!

Chicken Potpie - A traditional Pennsylvania Dutch dish from the More with Less Cookbook (this is more like chicken and dumplings than a casserole, just so you know ...)


Cook in a large kettle until tender:
1 large chicken fryer
2-3 qt. water
salt and pepper
Remove chicken, cool, and remove meat from bones.

Prepare vegetables:
2-3 potatoes, cubed
1 onion, chopped
2 stalks celery, chopped
1/4 c. parsley, chopped

Prepare potpie dough:
Combine 2 c. flour and 1/4 c. salt
Cut in 1 Tbsp. lard or shortening or butter
Add 1/4 c. water and 1 large egg, slightly beaten.
Mix to form a ball.  Cover and let stand 15 minutes.

Add vegetables and meat to broth.  Cook until vegetables are tender.  On a floured surfact roll out dough as thin as possible, cut into 1 1/2" squares, and drop into broth.  Cook 5-10 min and serve.


First of all, the use of the word "kettle" in the directions meant that I couldn't wait to make this one.  Not a pot, or even a stockpot ... nope, a kettle.  So, I found myself a kettle and cooked away.  The resulting soup was delicious and really hearty - and just so simple!  I love simple.  And REAL!  All this talk about "real food" as if it's a new fad - nope, it's been going on for ages.

Back to the recipe.  If I needed a shortcut, I would boil chicken pieces instead of a whole chicken - either thighs (because I love dark meat) or boneless skinless chicken breasts (because of ease).  The potpie dough was a little salty - 1/4 cup of salt will make that happen - but we like salty here so we went with it.  I think next time though I might add a tablespoon or two less.  But because there's not any salt added anywhere else in the recipe (except for boiling the chicken), it does add flavor to the rest of the soup.

I know, I know - it's not soup season anywhere else in the world - except for New England.  We've had some really lovely days, and some chillier days.  We're still waiting on the trees to bud, actually.  Not a leaf in sight in my neighborhood, folks.  All the snow is gone (thankfully) but we're still waiting on spring!  So, bring on the potpie!

3.26.2014

Baby Quilt for Baby B

Attempted partial group shot!
In mid-January, I got to go to Virginia for a reunion with a bunch of friends.  This was no ordinary reunion - for one, it was freezing cold.  Also, none of our husbands were able to come with us, so we were a bunch of ladies with crazy kids in a giant house on an awesome farm.  It was phenomenal!

I have lost track of how many adults and kids there were.  I think it was something like 10 or 11 (moms) and 15 (kids), plus three yet-to-be-born little ones.  Oh, did I mention that the oldest child had just turned four?  The oldest child had just turned four.  My E was the second oldest at barely 3.  


We got to throw a baby shower for our sweet friend V, who was expecting her first just a few weeks after the reunion.  Besides a delicious meal catered by our local friends and a special time to giggle and cry together, we worked on a group quilt for V's little girl.  Each of us brought a fabric from home to contribute.

Given our time frame and limited access to sewing supplies, though, we were just able to cut the quilt out and lay it out before we left.  We left it in the capable hands of a local friend who's shared some photos of the finished product!  I am SO excited with how it turned out.

Front:

Back:

With a baby!  A real, live, sweet little baby girl!
In the nursery:


Let's see if I can remember some of the details of this one.  This is going to be the world's worst tutorial on making a windowpane baby quilt, but here goes:

30 3.5x3.5" blocks
7 3.5x7.5" blocks
5 7.5x7.5" blocks
1.5" strips of white to go between the blocks
dark and light strips for borders

Windowpane Baby Quilt
It was meaningful for me to be part of such a special group project with women I've shared so much with.  Hopefully it's keeping little B warm and snuggly until I can get my hands on her in person!

3.24.2014

Thrift Store Find

You all know how much I love free stuff, cheap stuff, thrifted stuff, old stuff, recycled stuff, upcycled stuff ... you get the picture.

I found this beauty at a thrift store this week, and just can't wait to do a million things with my little metal tackle box.  I can't decide if I want it to hold art supplies for the kiddos, jewelry on my dresser, or sewing notions.

Or, it might be my on-the-go emergency kit to keep in my car this summer - just the right place for granola bars and sunscreen.  Oh the possibilities!

3.22.2014

Craft Fairs and Farmer's Markets

Howdy friends, just wanted to pop in with some pictures to let you know I'm stocking up on a lot of baskets in anticipation of some craft fairs and (hopefully) farmer's markets.  It's been great fun experimenting with rope and thread.  My newest favorite: Mega Basket.
You are looking at 200 continuous feet of rope, and I don't know how many feet of thread (I'd guess somewhere around 600-700).  Mega, indeed!

And here are a few other coiled rope baskets ... variations of ones currently for sale in my Etsy shop!


3.21.2014

Improv Quilting Class #3


Our third week of improvisational quilting is now completed.  As always, I am astounded by the talent and creativity that I get to work with!  I am only "teaching" this class in terms of facilitating.  They don't really need me (but shhh, don't tell them that).

Class #3 was about "stitch and flip" - which may or may not be a real term.  Ha!  I like making things up.  I think it could also be called faux piecing or faux applique (faupplique, if you will).

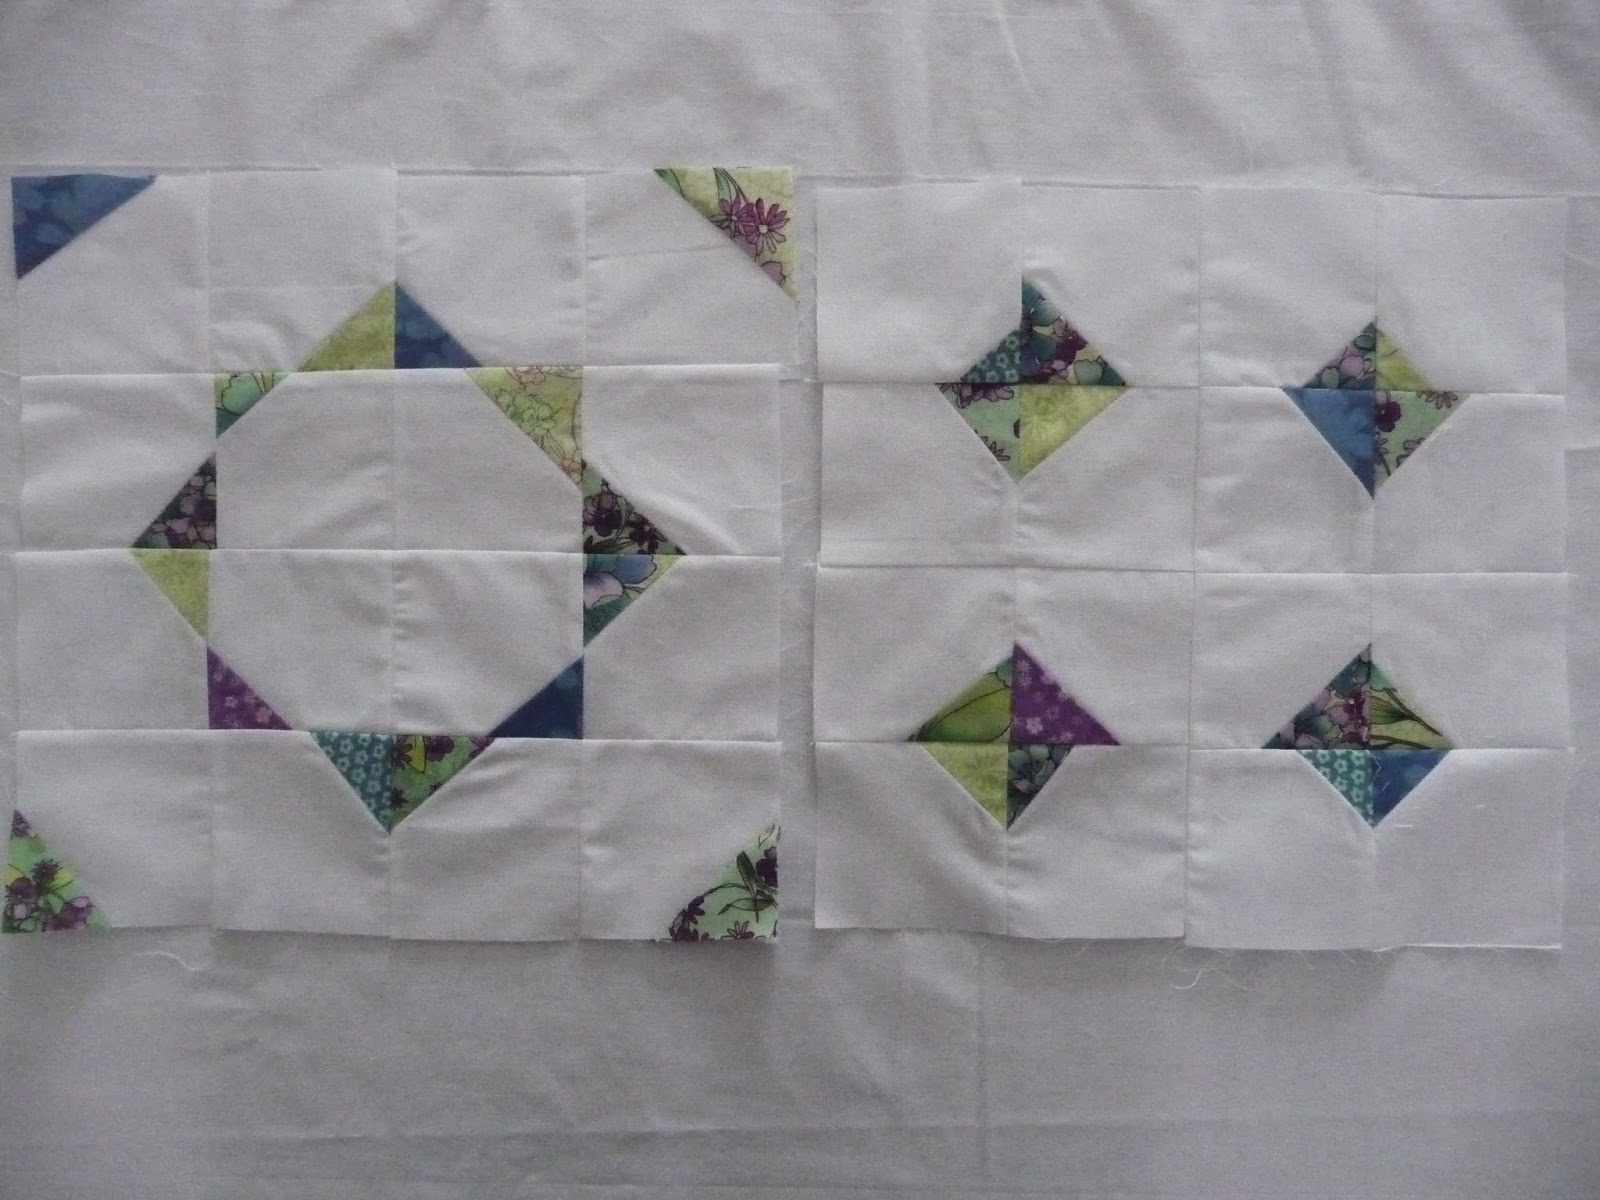
Start by cutting 16 3.5" x 3.5" white squares.  Take a scrap of fabric of any size (a triangle or rectangle is nice), and with right sides together, sew it to one corner of one of the white squares.  What you want is for the scrap to cover the corner when it's folded over and ironed.  It may take a little bit of eyeballing to get the hang of it (because it feels like you are actually sewing it upside down and backwards).  Repeat with the rest of the squares.

Fold the scraps over to cover the white corner, iron flat, and then trim even with the square.


Arrange 16 squares as desired, sew together, and iron.  Trim block to 12.5"x12.5".


This is how I arranged my two blocks.  You can tell that they are pretty wonky and nothing really matches up - but I'm operating under the philosophy that if nothing matches up, then it looks like it's supposed to be that way!  Don't give away my secrets, please.

I wish I had gotten pictures of everyone's block variations, but I just managed to snap this one.  One of the participants went a step beyond a single stitch-and-flip and went for opposite corners of every square.  Here's what she came up with (I absolutely love it!):


Three more classes to go ... we'll be revisiting the stitch and flip for a second week next time!